

Tools
 Subscription Lists
A subscription list is a group of people who have agreed to hear from you. People join by texting a keyword or filling in a web page, and then you can text everyone at once.
Create a list
- Click
 Subscription Lists under Tools in the left-hand menu, or open Subscription Lists.
- Click New List.
- In List name, type a name for the list.
- In Keyword, type the word people will text to join.
- Click Create list.
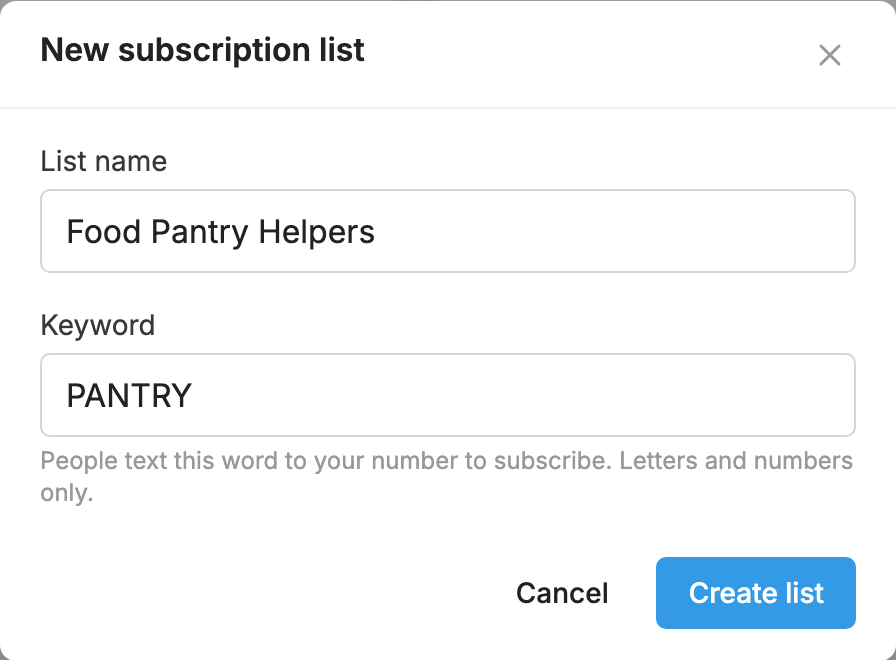
You land on the new list's  Settings tab, where you can write your welcome message and choose what else happens when someone joins.
The Subscription Lists page shows each list with its keyword and its number of subscribers, automations and scheduled messages. Use the switch at the top to see cards or a table.
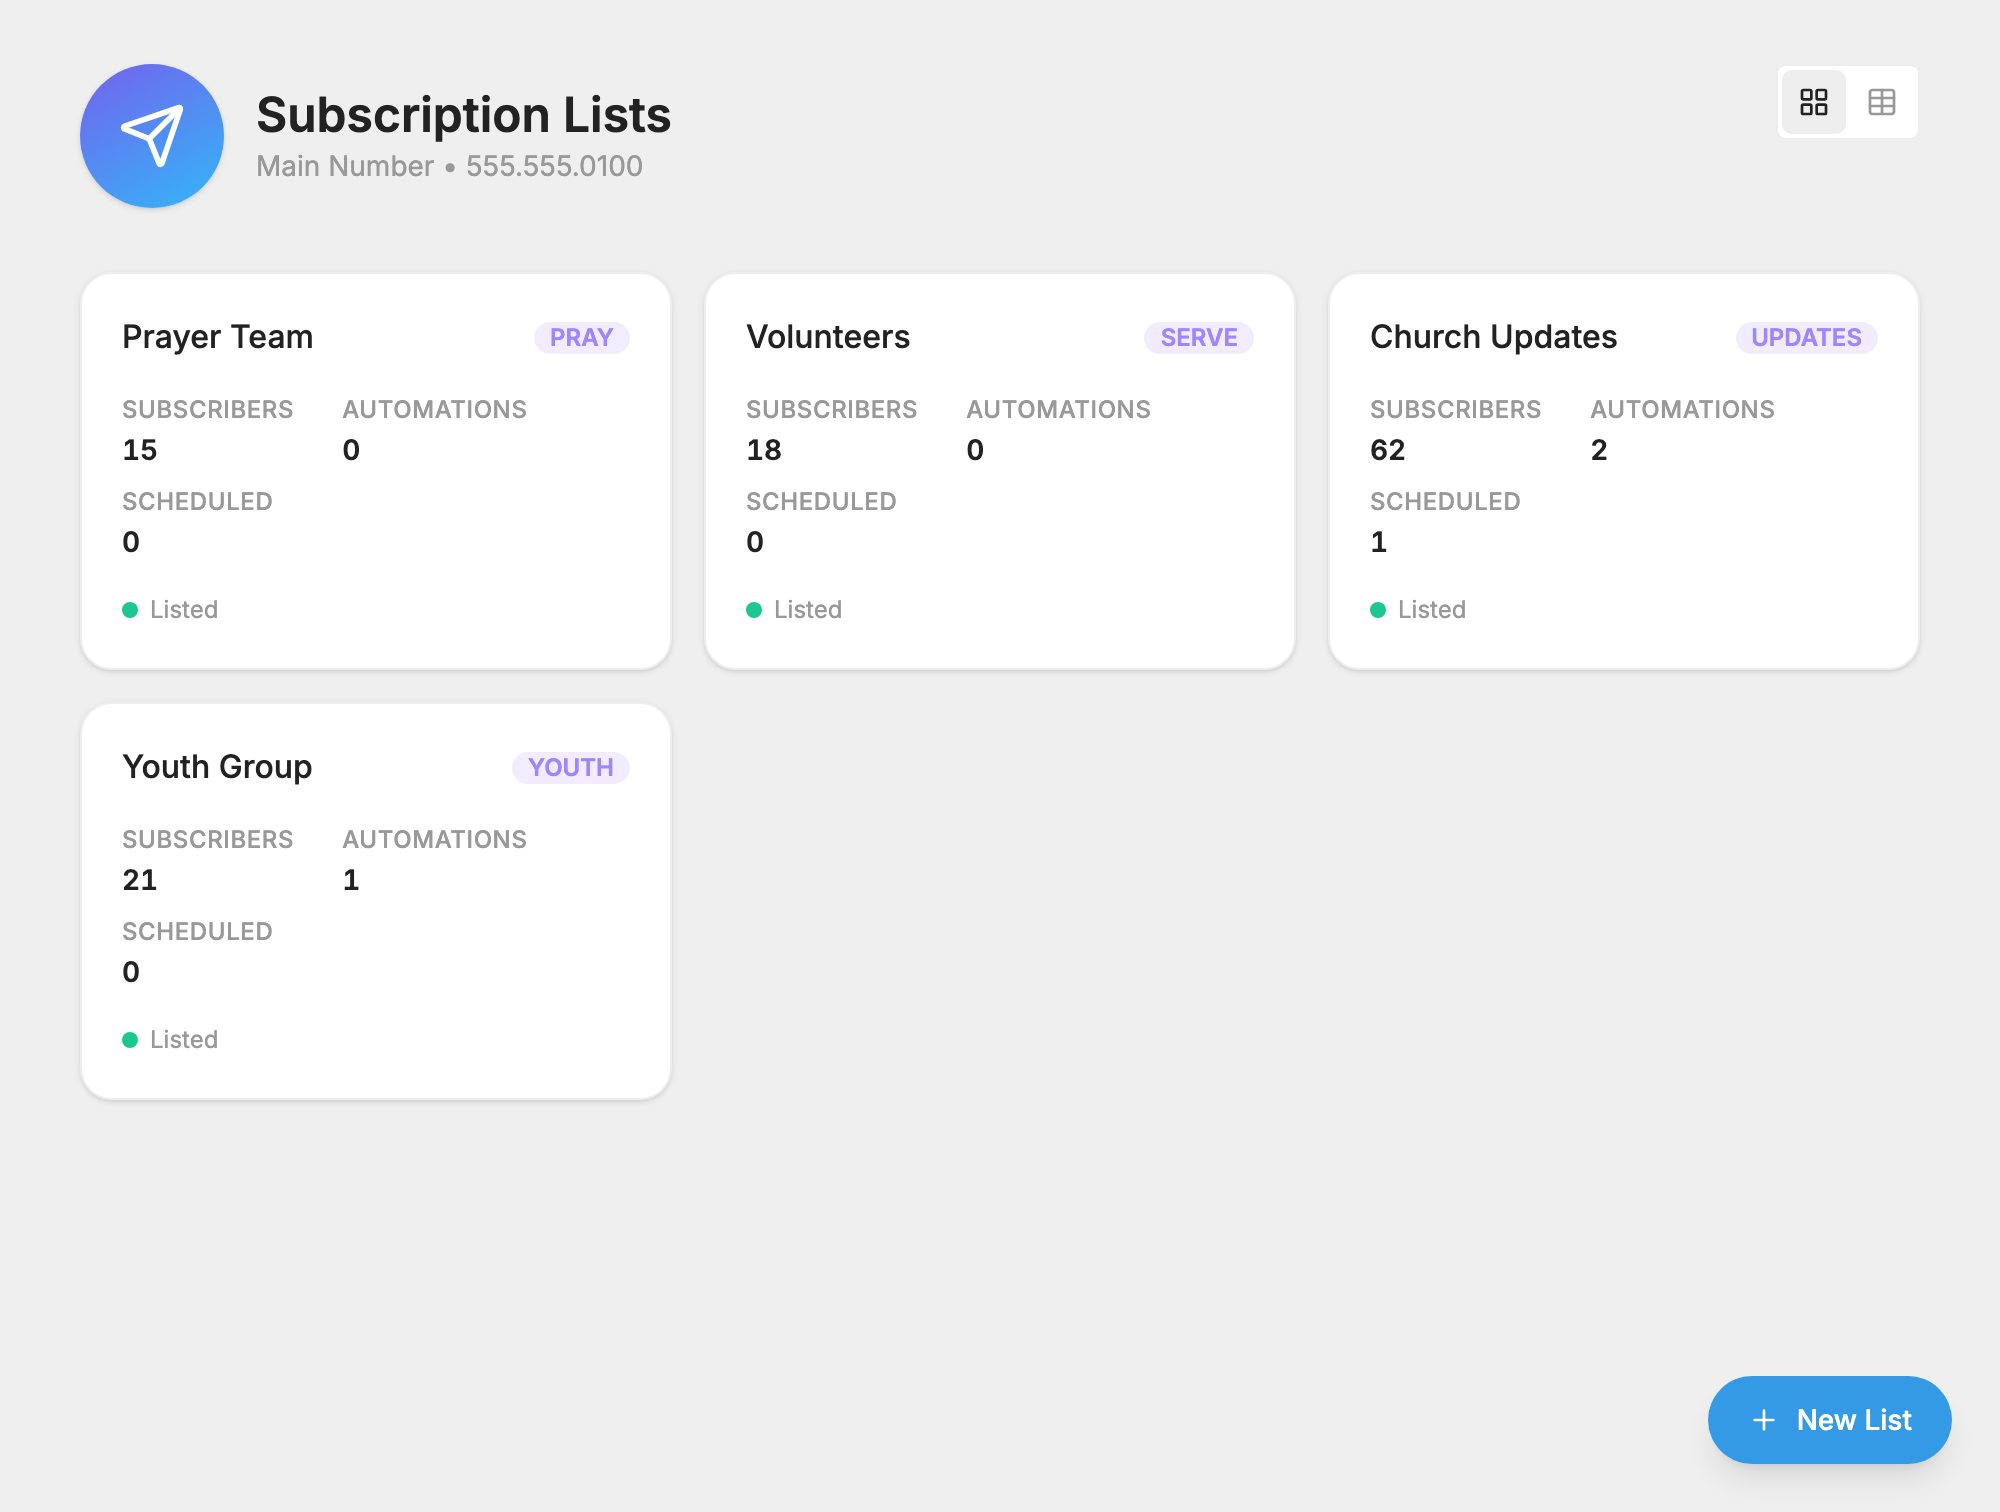
Each list has four tabs: Members, Messages,  Automations and Settings. The Share button sits at the right of the tabs.
How people join
By text
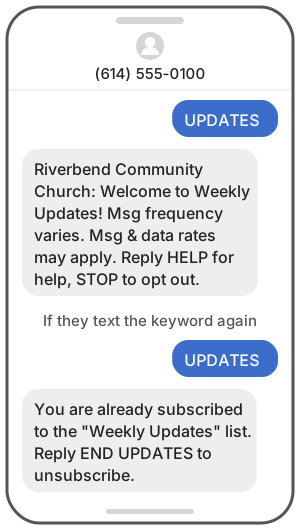
Someone texts the list's keyword to your number. They're added right away and get your welcome message. The keyword is shown beside the list's name.
If they're already on the list, they get a note saying so, with how to leave: "You are already subscribed to the "Weekly Updates" list. Reply END UPDATES to unsubscribe." If you've turned on Send the last message on sign-up, they get your most recent message instead.
On a web page
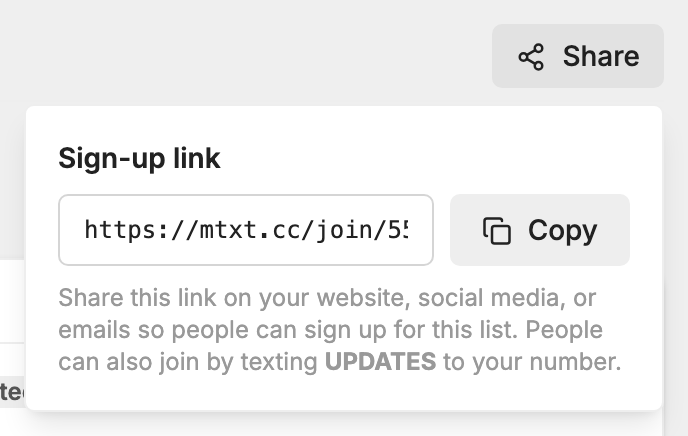
Every list has its own sign-up page you can share on your website, on social media or in an email.
- Open the list.
- Click Share.
- Click Copy to copy the Sign-up link. It looks like https://mtxt.cc/join/614.555.0100/updates.
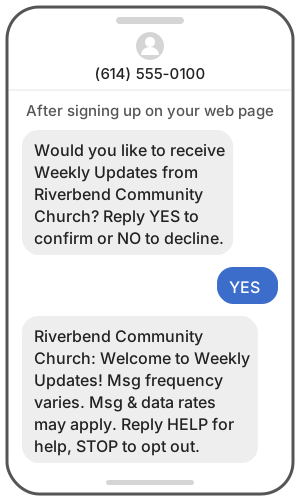
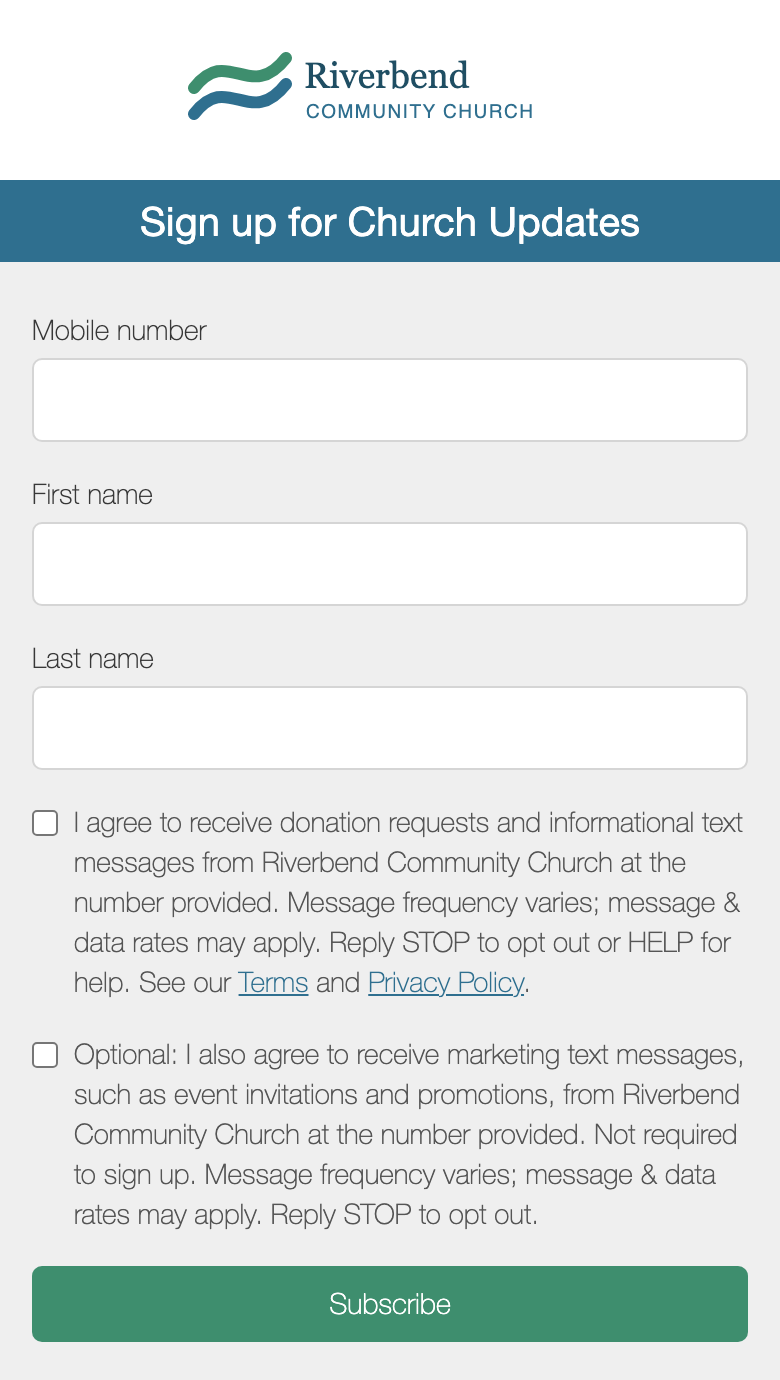
On that page, a person enters their Mobile number, First name and Last name, ticks the consent box and clicks Subscribe. If you registered for promotions as well as other messages, a second, optional box asks about marketing texts. We then text them to confirm: "Would you like to receive Weekly Updates from Riverbend Community Church? Reply YES to confirm or NO to decline."
- When they reply YES, they join the list and get the welcome message, just as if they had texted the keyword.
- When they reply NO, they aren't added.
- If they don't tick the consent box or leave out their number, nothing happens and the page explains why.
- The request stays open for a week. If they sign up again in that time, the page reminds them to reply YES.
The page uses your logo and colors from  Branding.
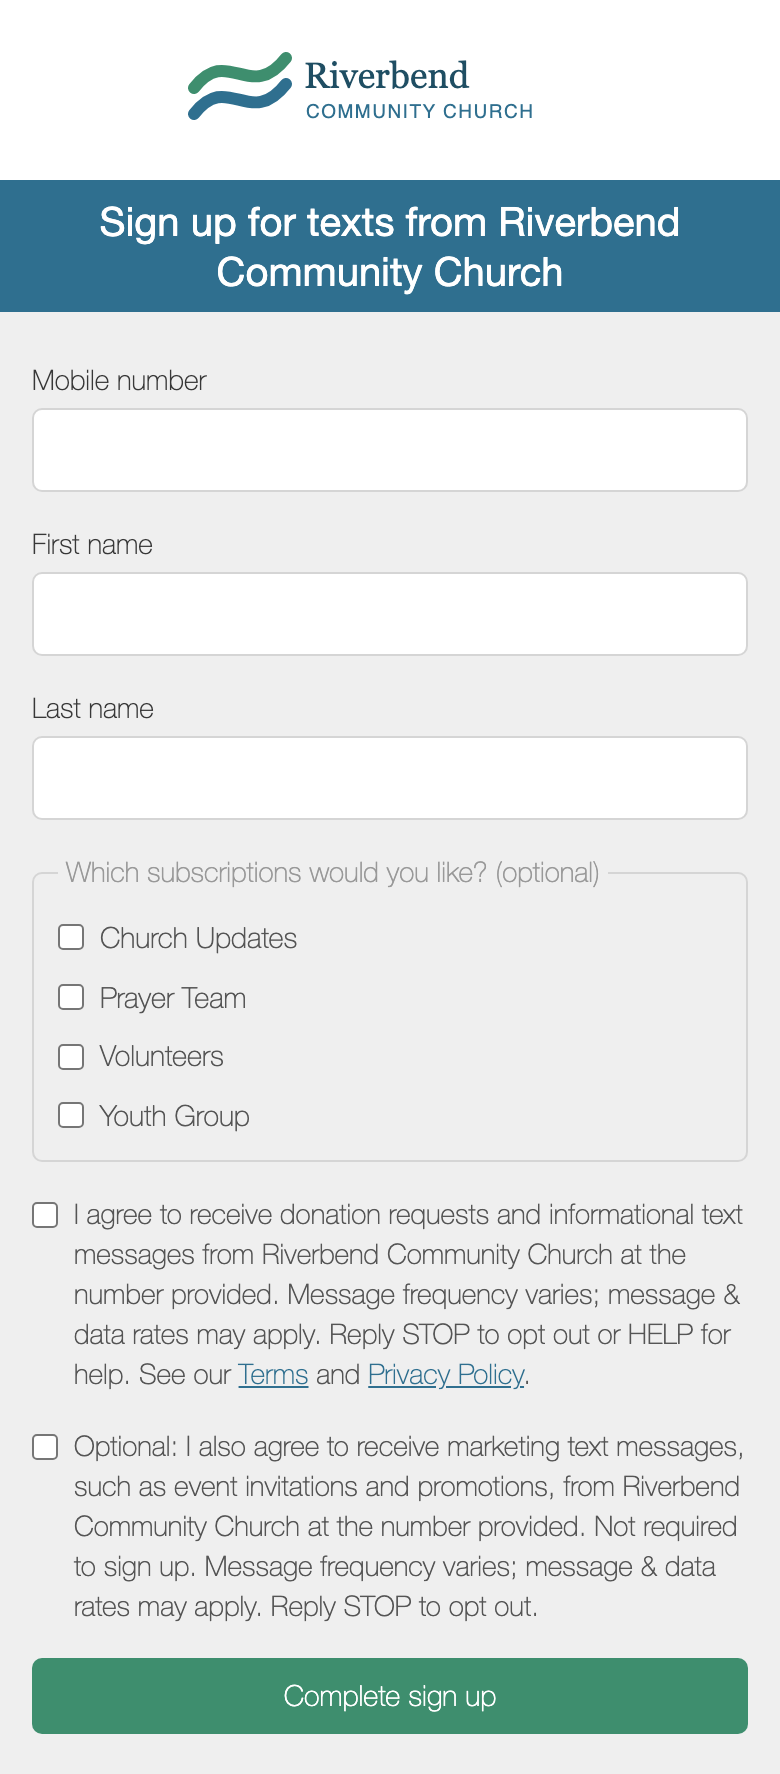
Your number also has one general sign-up page, at the same address without the keyword: https://mtxt.cc/join/614.555.0100. It lets people tick any of your lists that have Show this list in subscribers' settings turned on. People who sign up there get a short thank-you text after they reply YES, instead of each list's welcome message, and they aren't asked the welcome questions.
Added by you
You can add people yourself, one at a time or from a spreadsheet. See Add or import people.
What a new subscriber gets
Someone who joins by keyword or from the list's sign-up page gets these, in this order:
- Your welcome message, with your contact card if you've turned that on.
- Your most recent message to the list, if Send the last message on sign-up is on.
- The questions for their name and email, if you've turned those on.
Any Automations on the list start for them too.
Write the welcome message
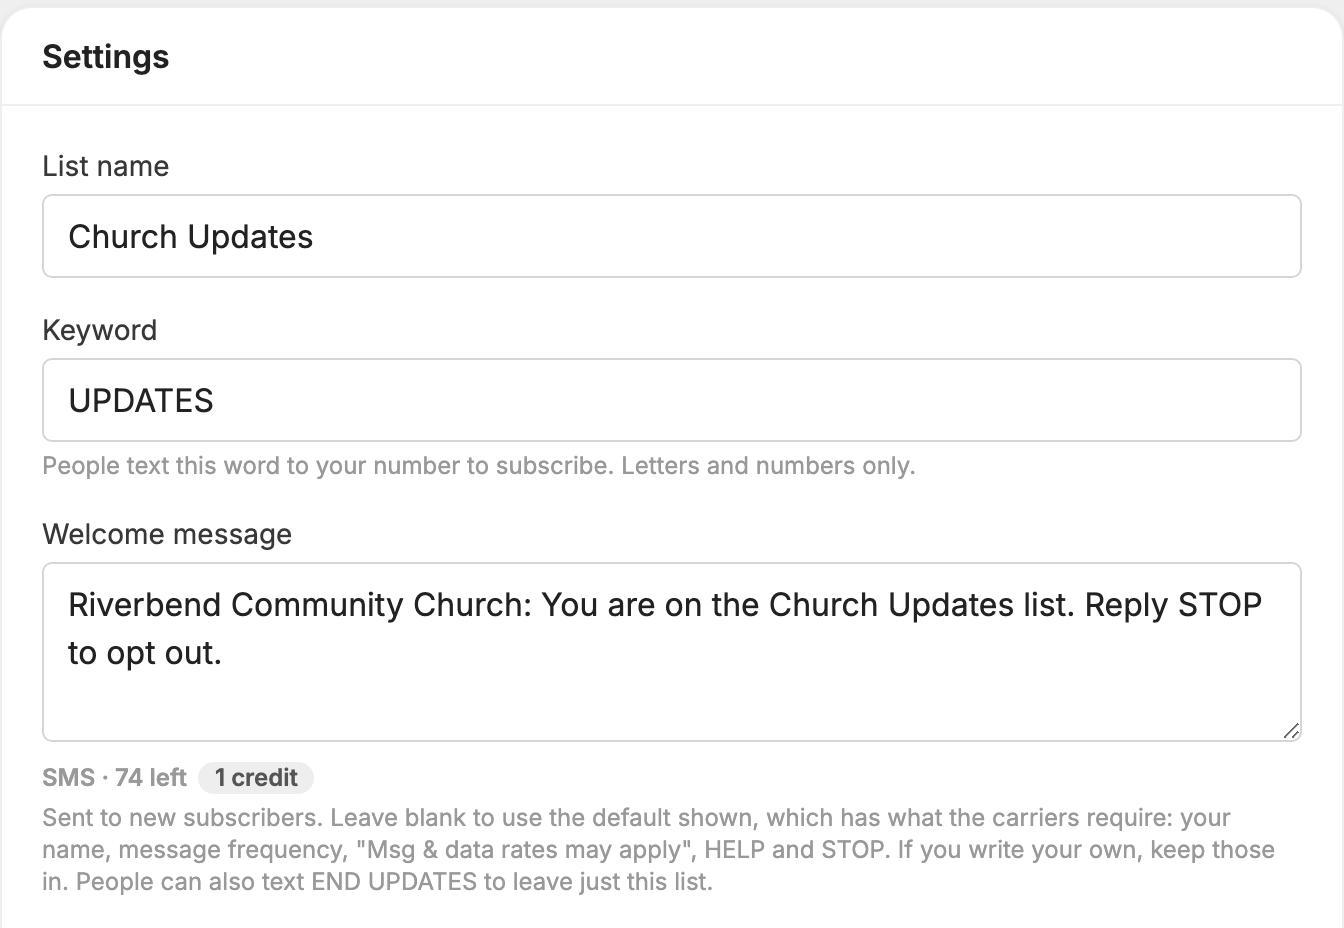
Open the list's Settings tab and type in the Welcome message box. If you leave it blank, the default shown in the box is used. It looks like this:
"Riverbend Community Church: Welcome to Weekly Updates! Msg frequency varies. Msg & data rates may apply. Reply HELP for help, STOP to opt out."
Carriers require a welcome to include your name, how often you text, "Msg & data rates may apply", HELP and STOP. The default has all of these. If you write your own, keep them in.
People can reply STOP to stop all your texts, or END followed by the keyword to leave just this list. See Words people can always text.
The counter under the box shows how many credits the welcome uses. A welcome that fits in one text uses 1 credit. See Credits and message length.
Ask for a name or email
Texting a keyword gives you a phone number and nothing else. A list can ask new subscribers for their name and email by text, one question at a time, right after the welcome.
- Open the list's Settings tab.
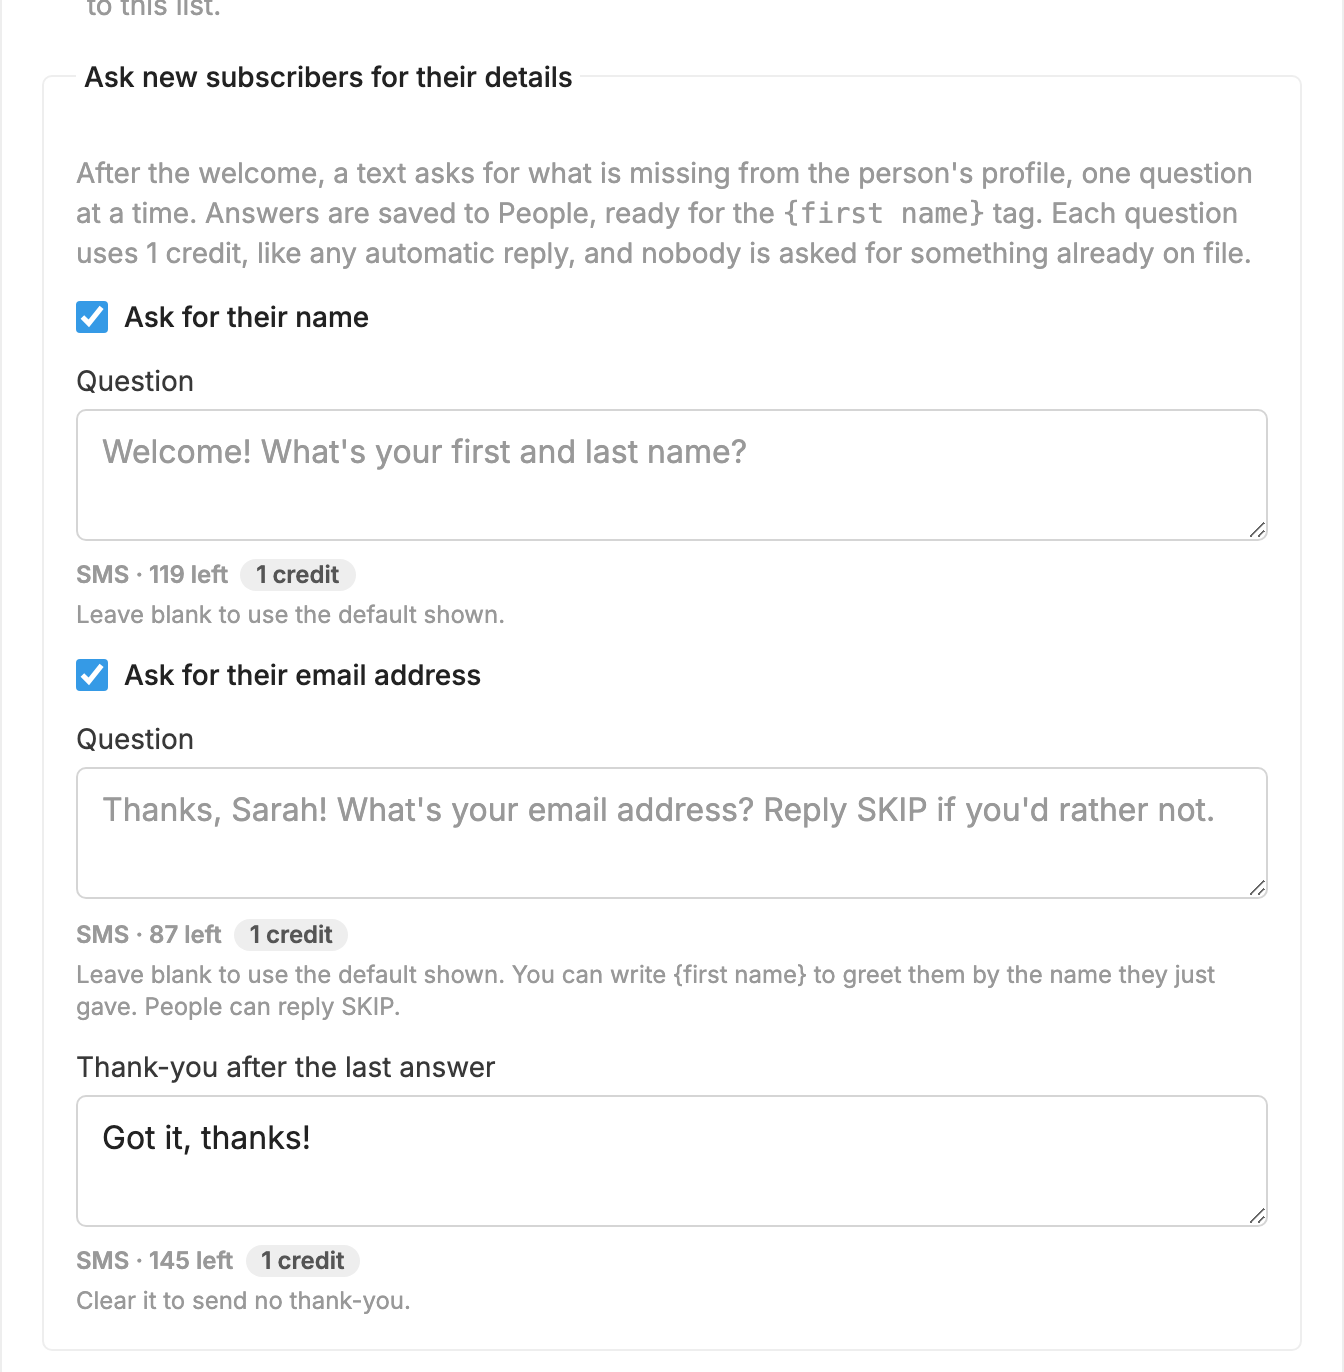
- Under Ask new subscribers for their details, tick Ask for their name, Ask for their email address, or both.
- Change the wording in the Question boxes if you like. Leave one blank to use the default shown.
- Change or clear Thank-you after the last answer. Clear it to send no thank-you.
- Click Save changes.
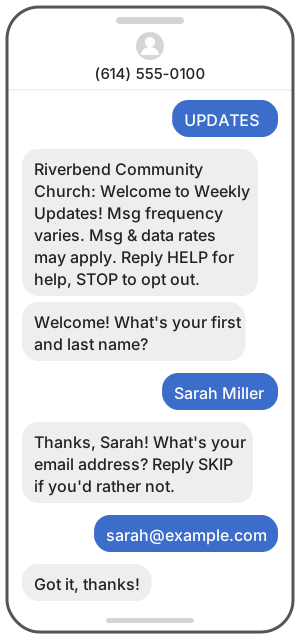
What the person experiences:
- The name question defaults to "Welcome! What's your first and last name?"
- The email question defaults to "Thanks, Sarah! What's your email address? Reply SKIP if you'd rather not." You can use
{first name}in your own wording to greet them by the name they just gave. - After the last answer they get your thank-you, which defaults to "Got it, thanks!"
Good to know:
- Nobody is asked for something already on file. Someone who signed up on your web page with their name is only asked for their email, and someone with both on file isn't asked at all.
- Answers are saved to the person in
 People, ready for the
{first name}tag in your messages. - People can reply SKIP to any question.
- A short reply that doesn't look like a name or an email is asked about once more. After that the questions stop.
- A question back, a long message, a vote or a dollar amount ends the questions and is handled as a normal text, so it reaches you. HELP, STOP and your other keywords work as usual.
- Each question and the thank-you is a text that uses a credit, like any automatic reply. With name, email and the thank-you on, that's up to 3 credits for each new subscriber.
- People who are in the middle of making a gift when they join aren't asked.
Send your contact card
A contact card lets a new subscriber save your number in one tap, so your texts show your name instead of a bare number.
- Make your card once on the Contact card tab of your number's Settings page.
- Open the list's Settings tab.
- Tick Send our contact card with the welcome message.
- Click Save changes.
The welcome then goes out as one picture message with the card attached, so it uses 3 credits instead of 1. If you left the welcome blank, the default tells people to save the card. If you wrote your own, click Add a sentence about the card to add that line.
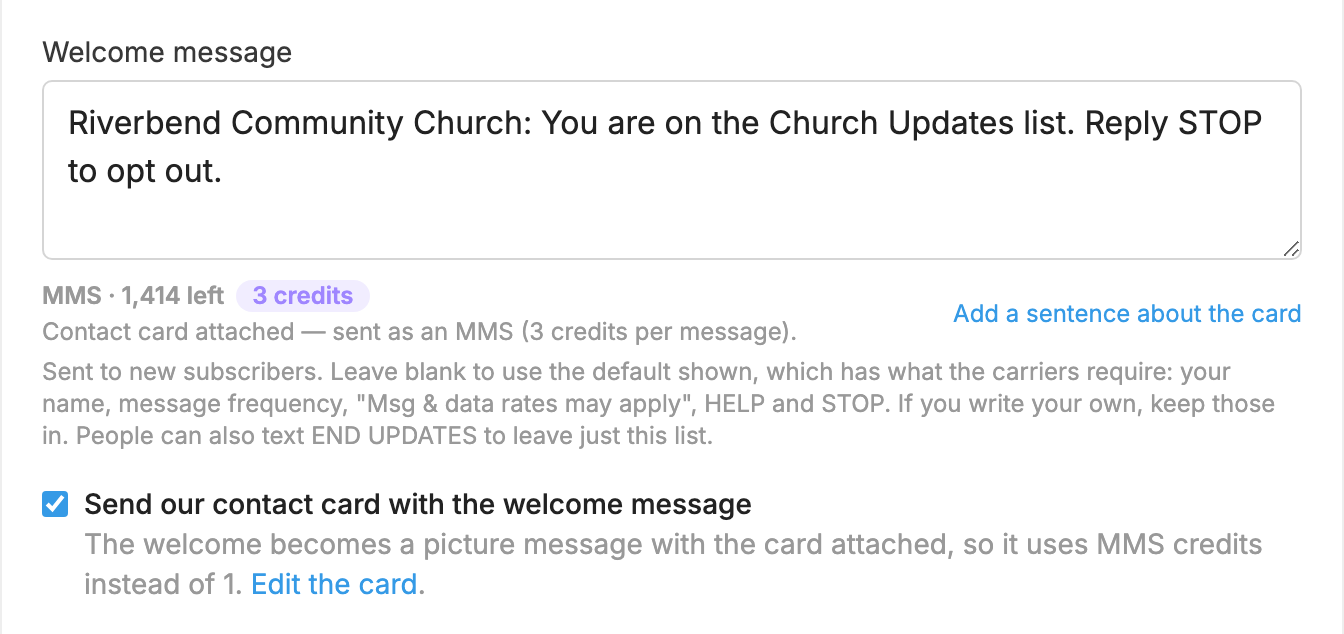
The box is greyed out until you have a card, or if your number can't send picture messages.
To send the card to people already on your list, write a message as usual and click Attach our contact card. It works in automations too.
Add or import people
Everything here is on the list's Members tab.
Adding or importing someone doesn't send them the welcome message or the welcome questions. Any Automations on the list do treat them as new members.
Add one person
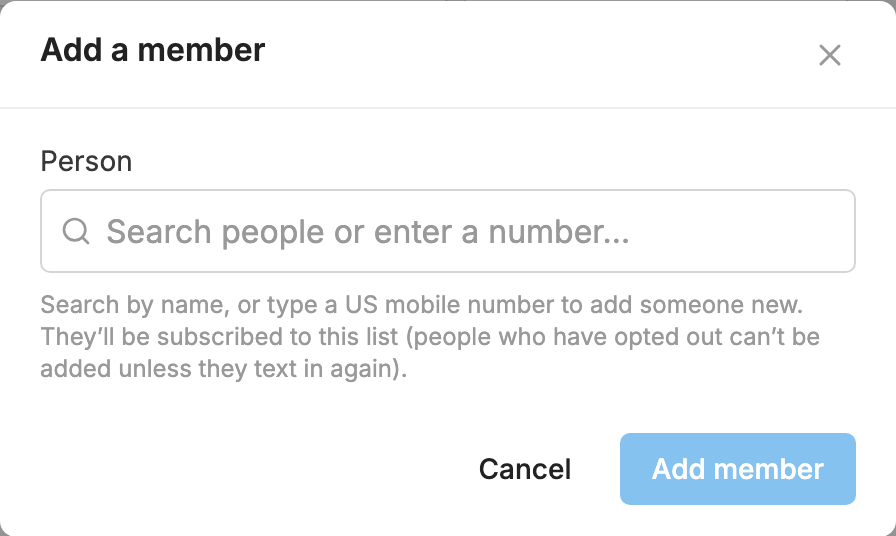
- Click Add member.
- Search for a name, or type a US mobile number to add someone new.
- Click Add member.
Import a spreadsheet
Save your spreadsheet as a .csv, .tsv or .txt file with one column for the mobile number. You can import up to 5,000 rows at a time, from a file of up to 8 MB.
- Click Import, then Import a CSV file…
- Choose your file.
- Tick both certifications that you have permission to text these people, then click Next.
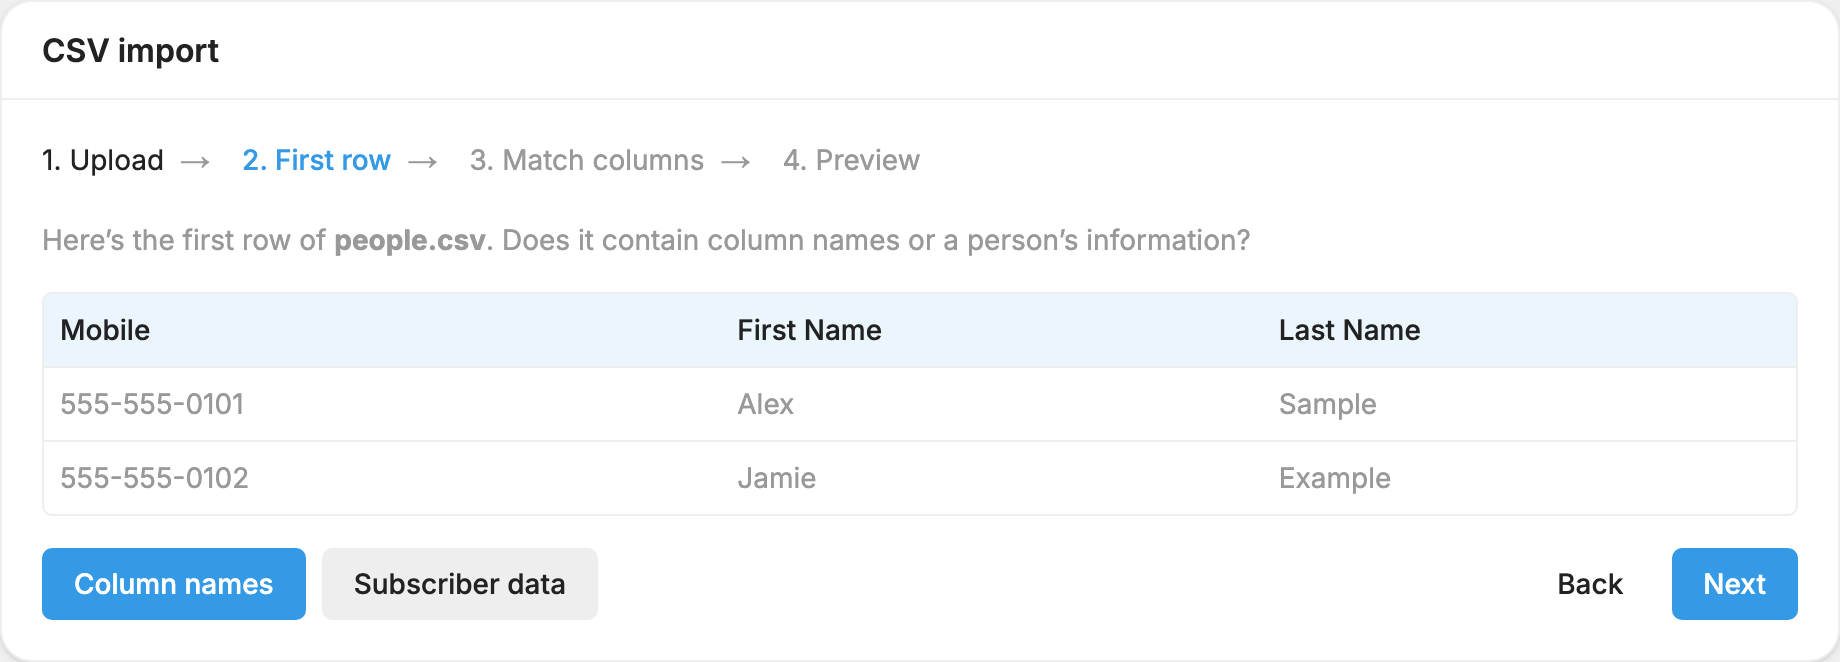
- MojoTxt shows the first row. Click Column names if it holds headings, or Subscriber data if it's already a person, then click Next.
- Match each column to a field, such as Mobile Number, Name (First) or Email. Leave a column on (Ignore) to skip it, then click Next.
- Check the Valid rows and Invalid rows counts and the preview. You can also click any tags to apply them.
- Click the Import button, which shows how many people will be added.
When it finishes, you see how many people were added, matched, subscribed and skipped. Someone already in People keeps their details. The import only fills in fields that were empty.

Import from another keyword
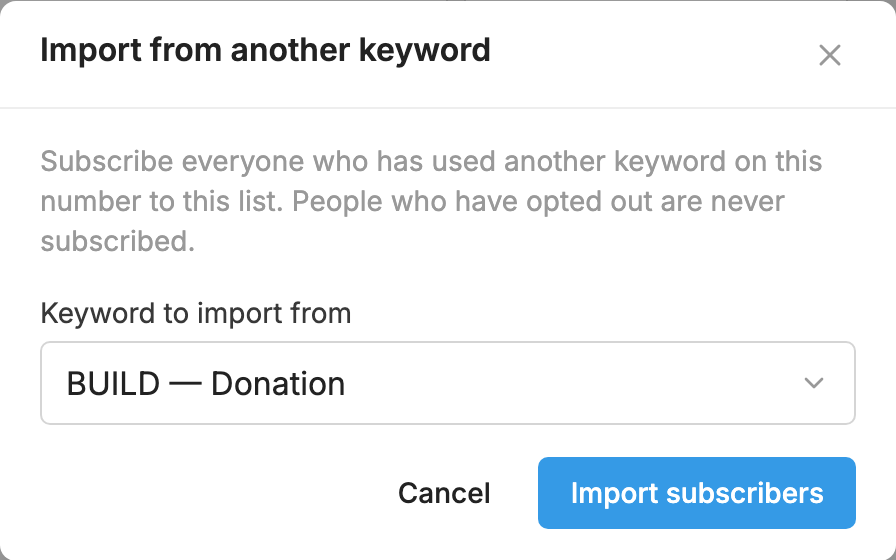
This adds everyone who has used another keyword on your number, such as a different list, a daily program, an auto-responder or a donation fund.
- Click Import, then Import from a keyword…
- Choose the keyword in Keyword to import from.
- Click the import button. The result shows how many people were imported and how many were skipped because they opted out.
Manage members
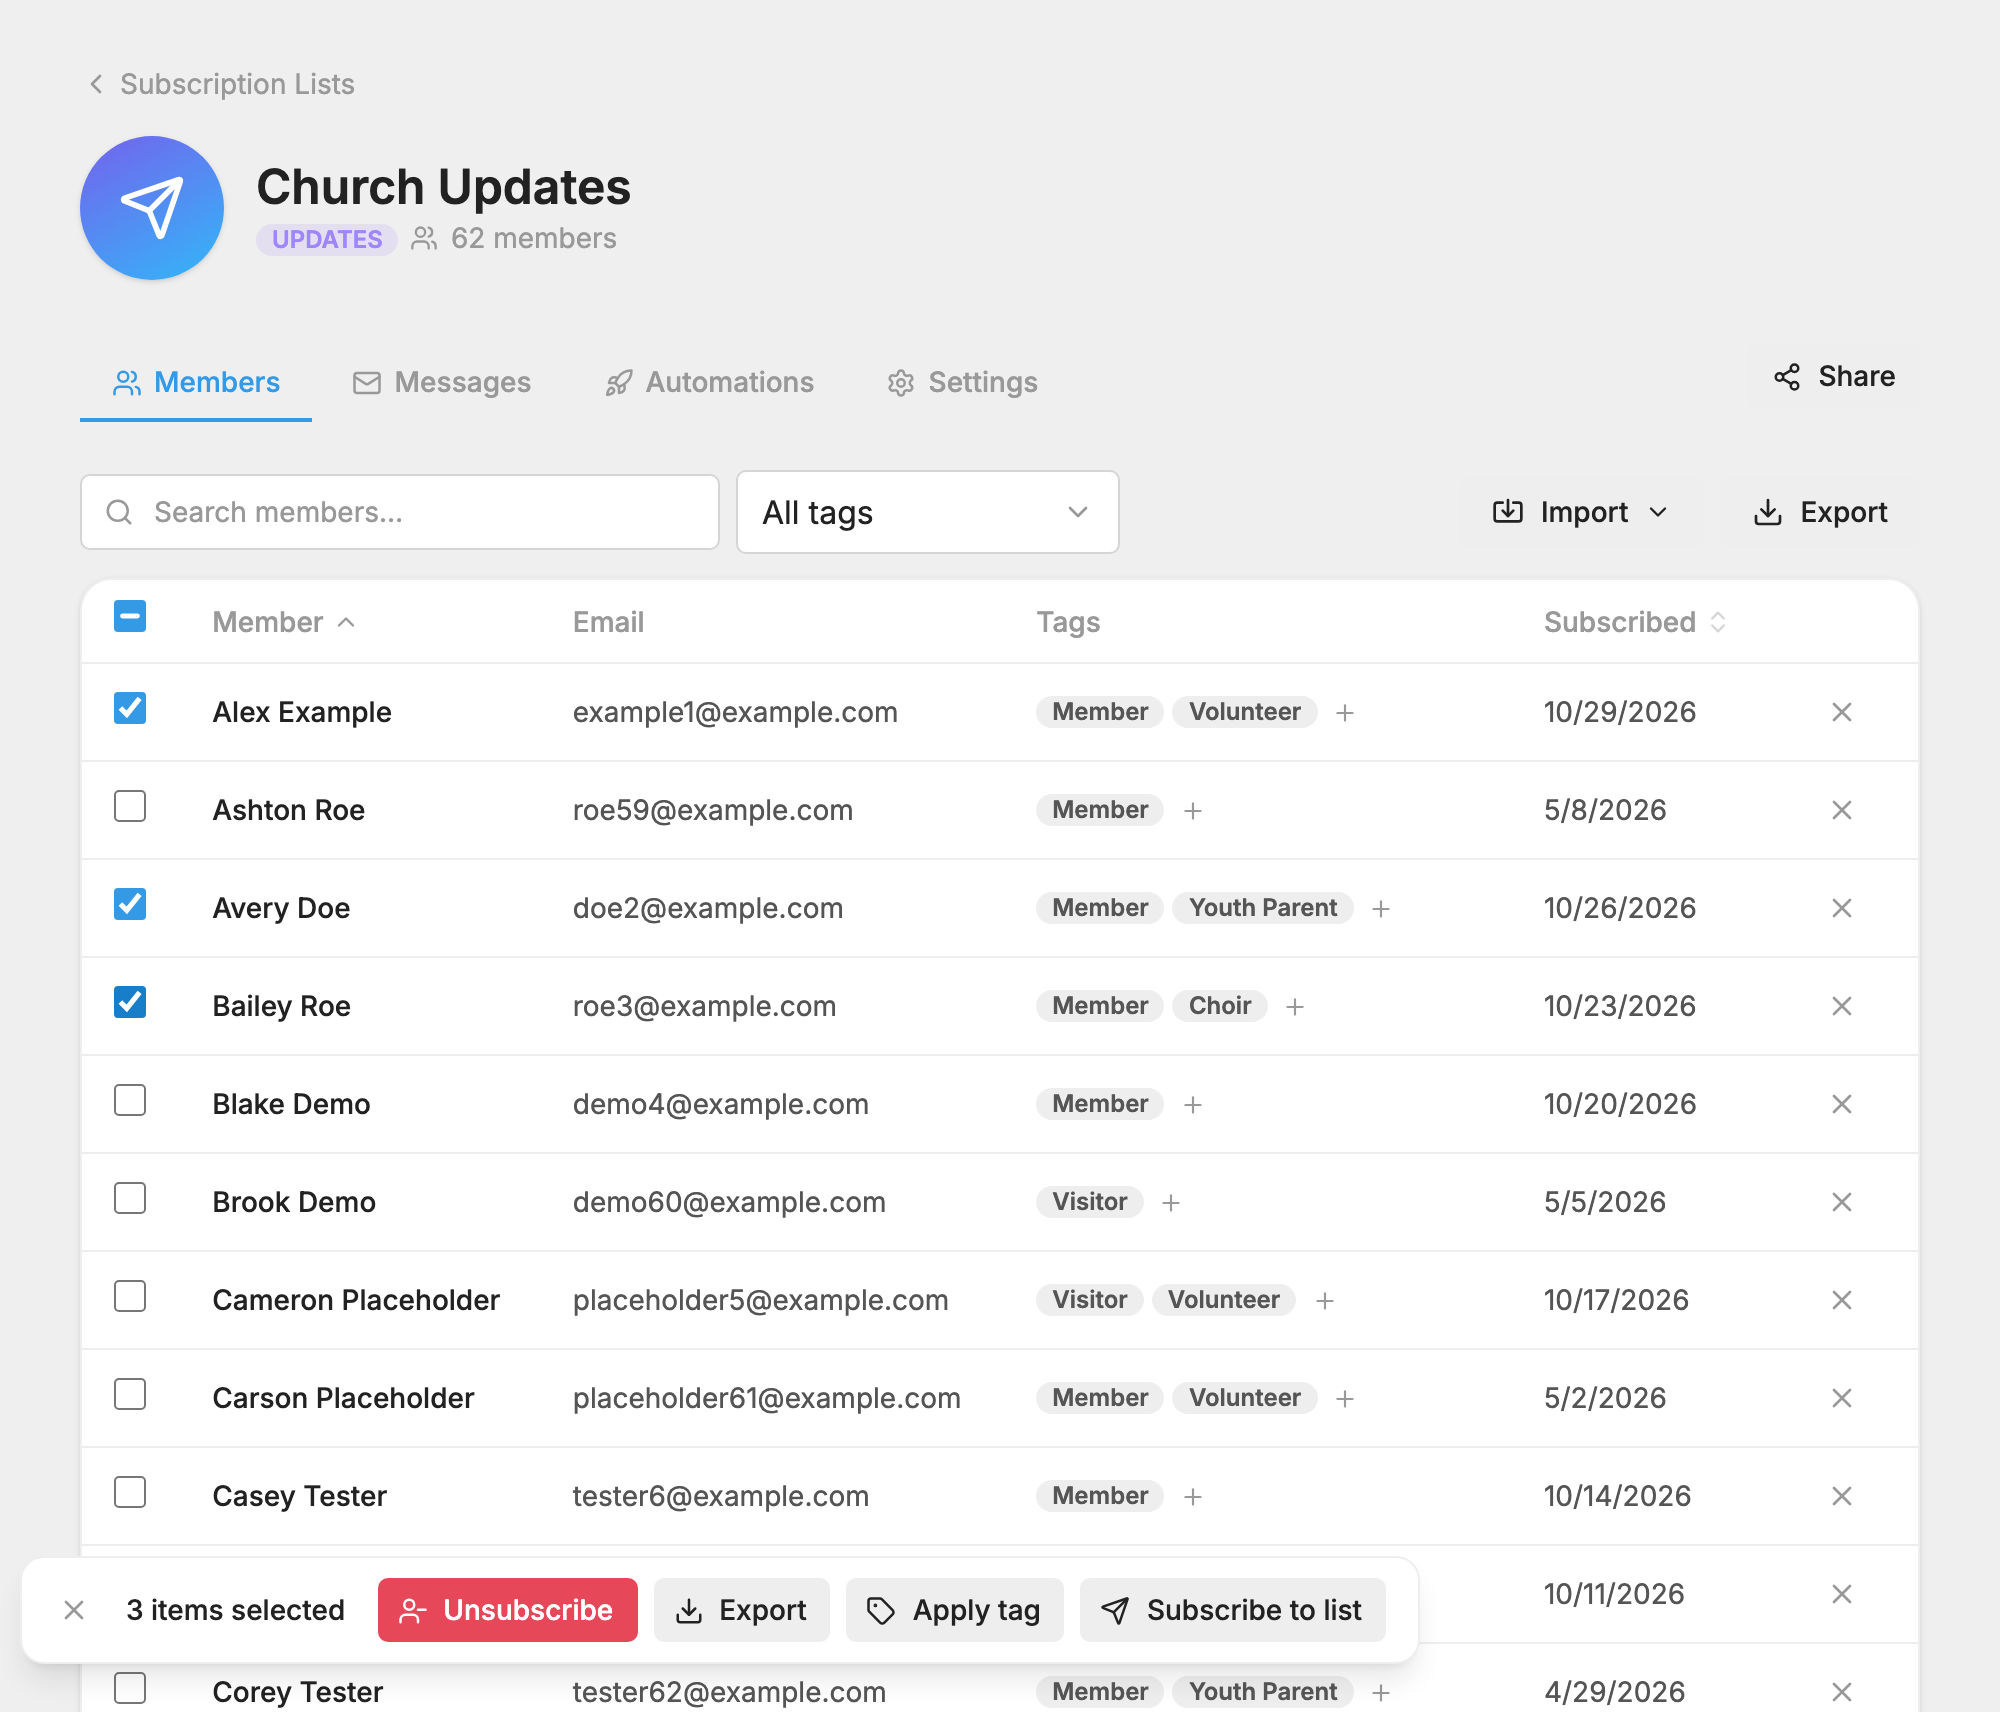
The Members tab lists everyone on the list, with their email, tags and the date they subscribed.
- Search by typing in Search members…
- Sort by name or subscribed date by clicking the column heading.
- Filter by tag with All tags, which appears once your number has tags.
- An Opted out badge means the person asked to stop, so they aren't getting this list's messages.
- An Inactive badge means the person isn't getting this list's messages for another reason: their texts stopped being delivered, or they opted back in after STOP without rejoining the list.
- To remove someone, click the X at the end of their row. They stop getting this list's messages but stay in People.
To act on several people, tick the box beside each one. Click the box at the top to select them all. The bar that appears offers Unsubscribe, Export, Apply tag and Subscribe to list.
To download the list, click Export. You get a CSV file with each person's ID, name, phone number, address and email. If you've searched or filtered, the file matches what you're looking at.
Tags
Tags are labels you put on people, such as Volunteers or Youth Parents. A tag belongs to your number, not to one list, and you can send a message to everyone with a tag.
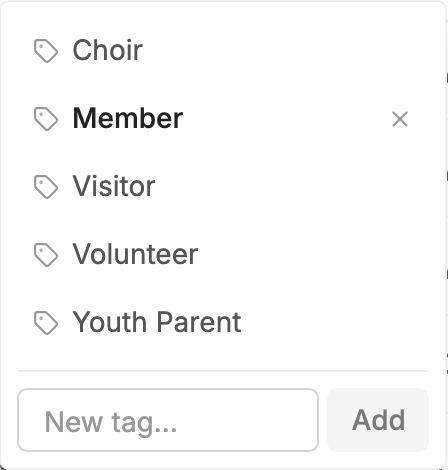
- To tag one person, click the small + in the Tags column of their row. Pick an existing tag, or type a name in New tag… to create one.
- To tag several people, select them and click Apply tag.
- To tag people as you import them, click the tags on the last step of the import.
You can see and manage all your tags in People.
Messages and Automations tabs
The  Messages tab opens the Messages page showing only this list, and the Automations tab opens the Automations page the same way. That's where you write to your list.
List settings
These are on the list's Settings tab. Click Save changes when you're done.
- List name: the name you see, and the name in the default welcome.
- Keyword: the word people text to join. If you change it, the old word stops working.
- Welcome message: see Write the welcome message.
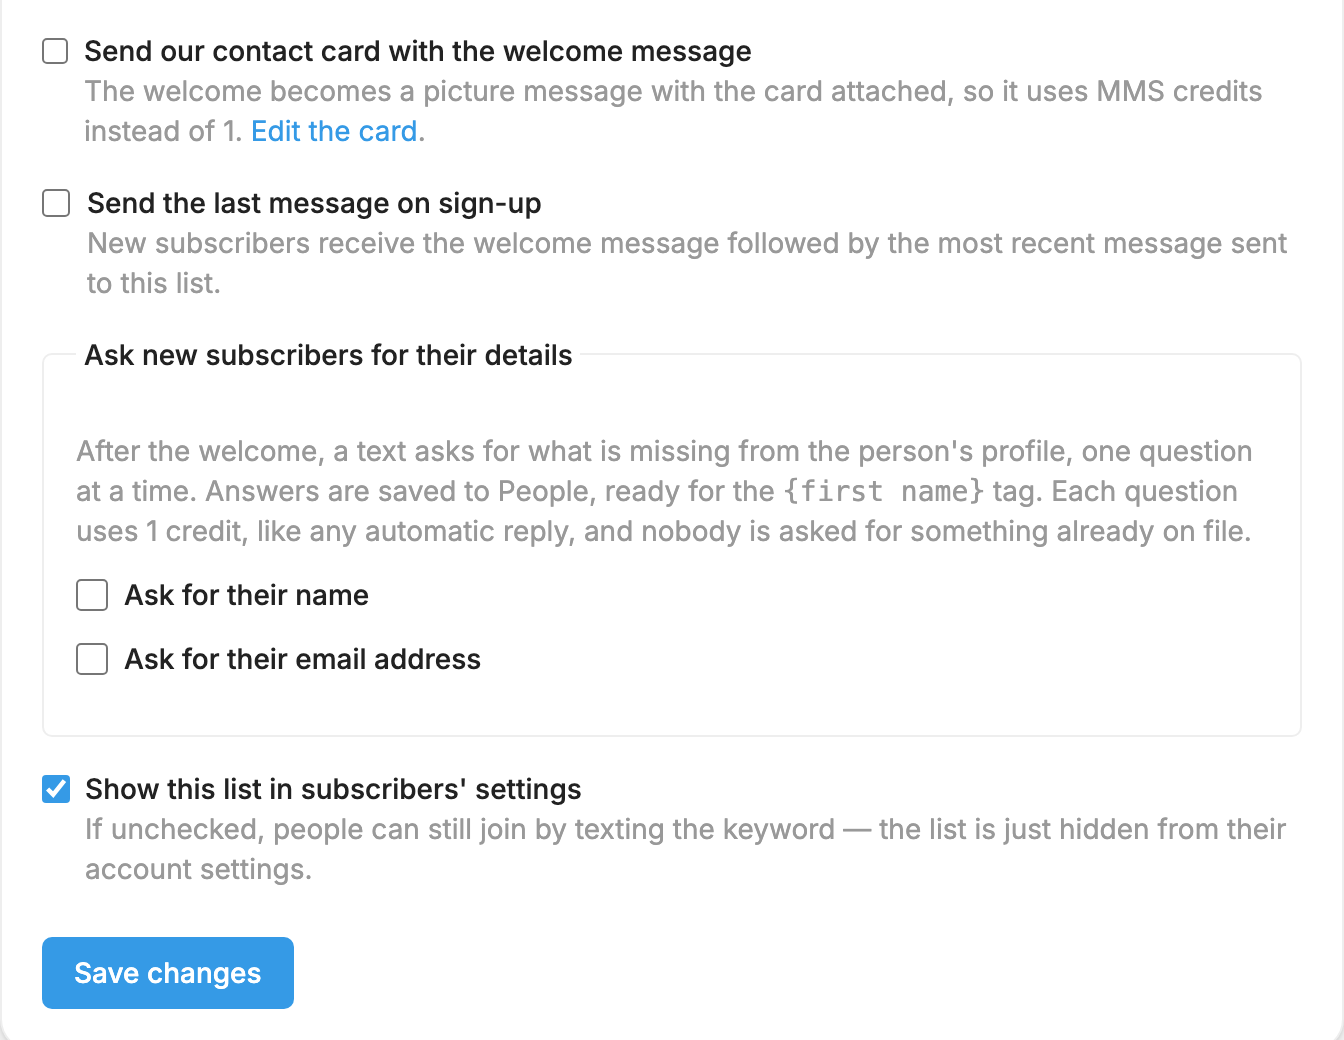
- Send our contact card with the welcome message: see Send your contact card.
- Send the last message on sign-up: new subscribers get your most recent message right after the welcome.
- Ask new subscribers for their details: see Ask for a name or email.
- Show this list in subscribers' settings: when this is off, people can still join by keyword, but the list is hidden from the page where they manage their subscriptions and from your general sign-up page.
Delete a list
- Open the list's Settings tab.
- Under Delete list, click Delete list.
- Confirm by clicking Delete list again.
The list and its memberships are gone for good, and its keyword stops working. The people themselves stay in People.

