

People
 People
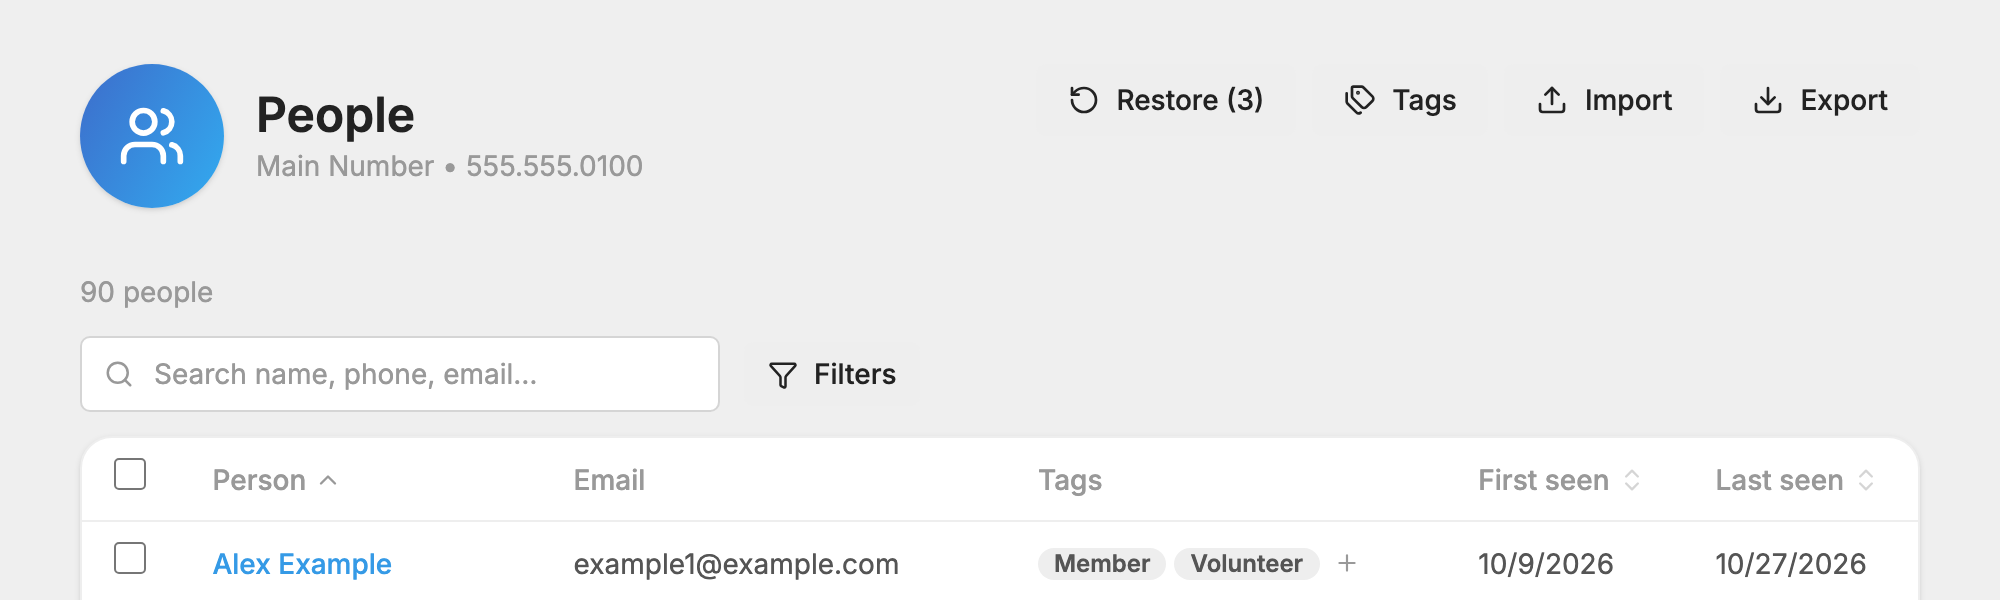
 is the directory of everyone on your number. Each person appears once, however many of your keywords they have used, and their profile shows the whole picture: lists, tags, donations and more.
People are added on their own the first time they text your number. You can also add them yourself or import them. Open People
Find someone
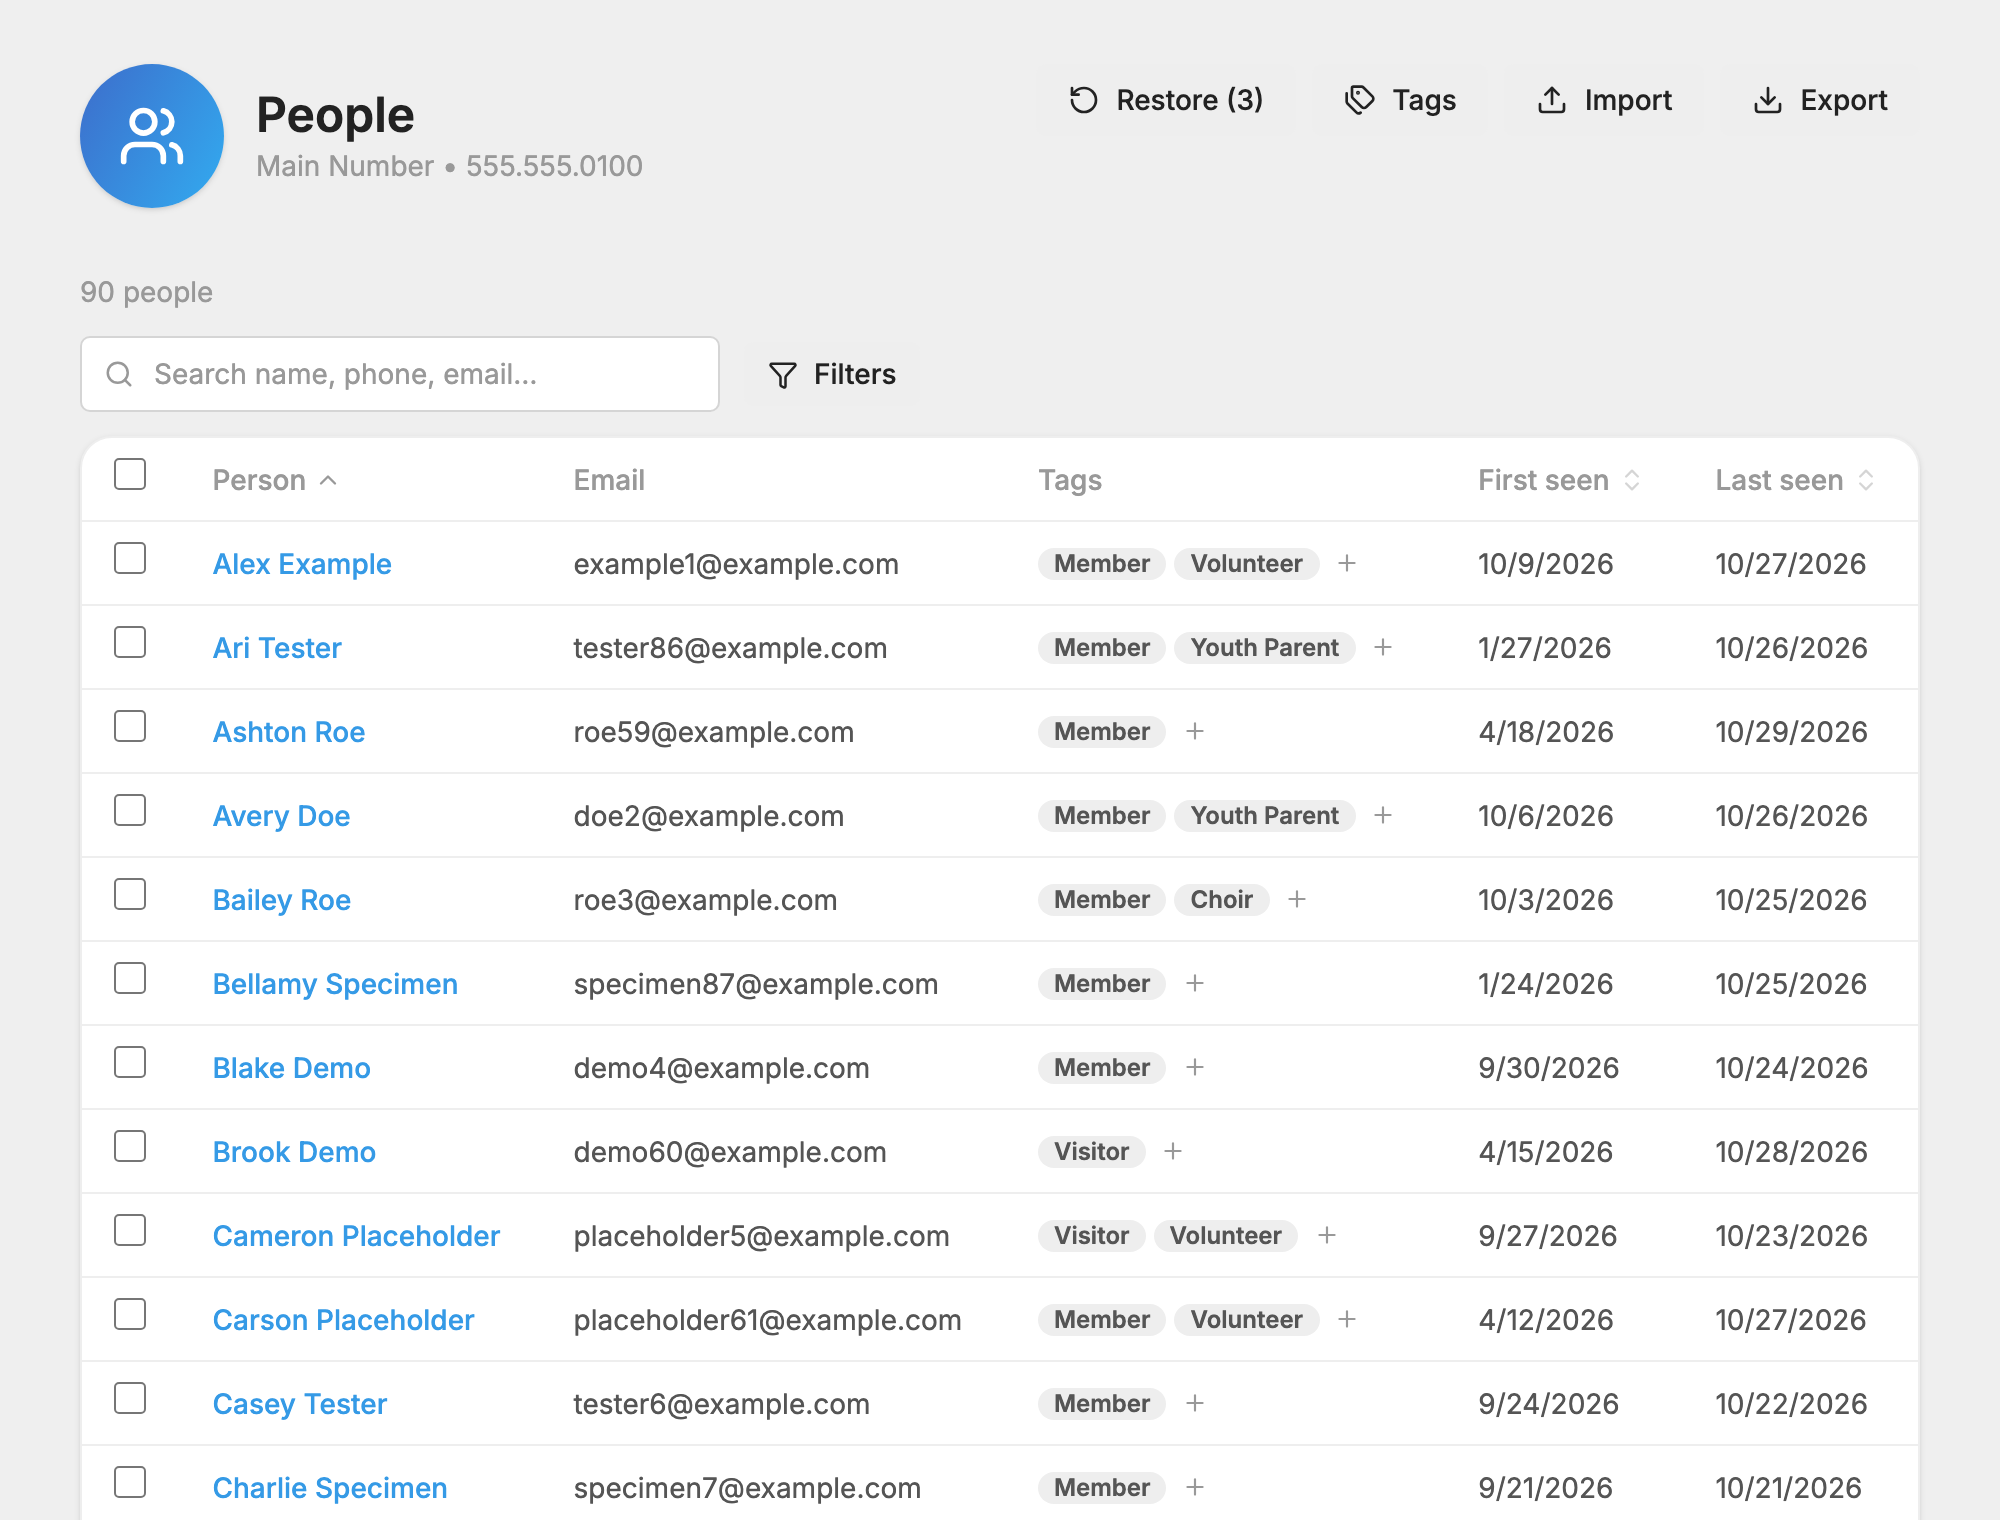
Type in the Search name, phone, email… box. The table shows each person's name, email and tags, plus First seen and Last seen, the first and latest time they used your number. Click Person, First seen or Last seen at the top of the table to sort.
To narrow the table, click Filters and pick from:
- Lists: people on a list.
- Tags: people with a tag.
- Donation funds: people who gave to a fund.
Each group has an Any and All switch. Any shows people in at least one of the things you picked. All shows only people in every one of them. What you picked shows as small labels next to the button. Click the X on a label to remove it, or Clear all filters to start over.
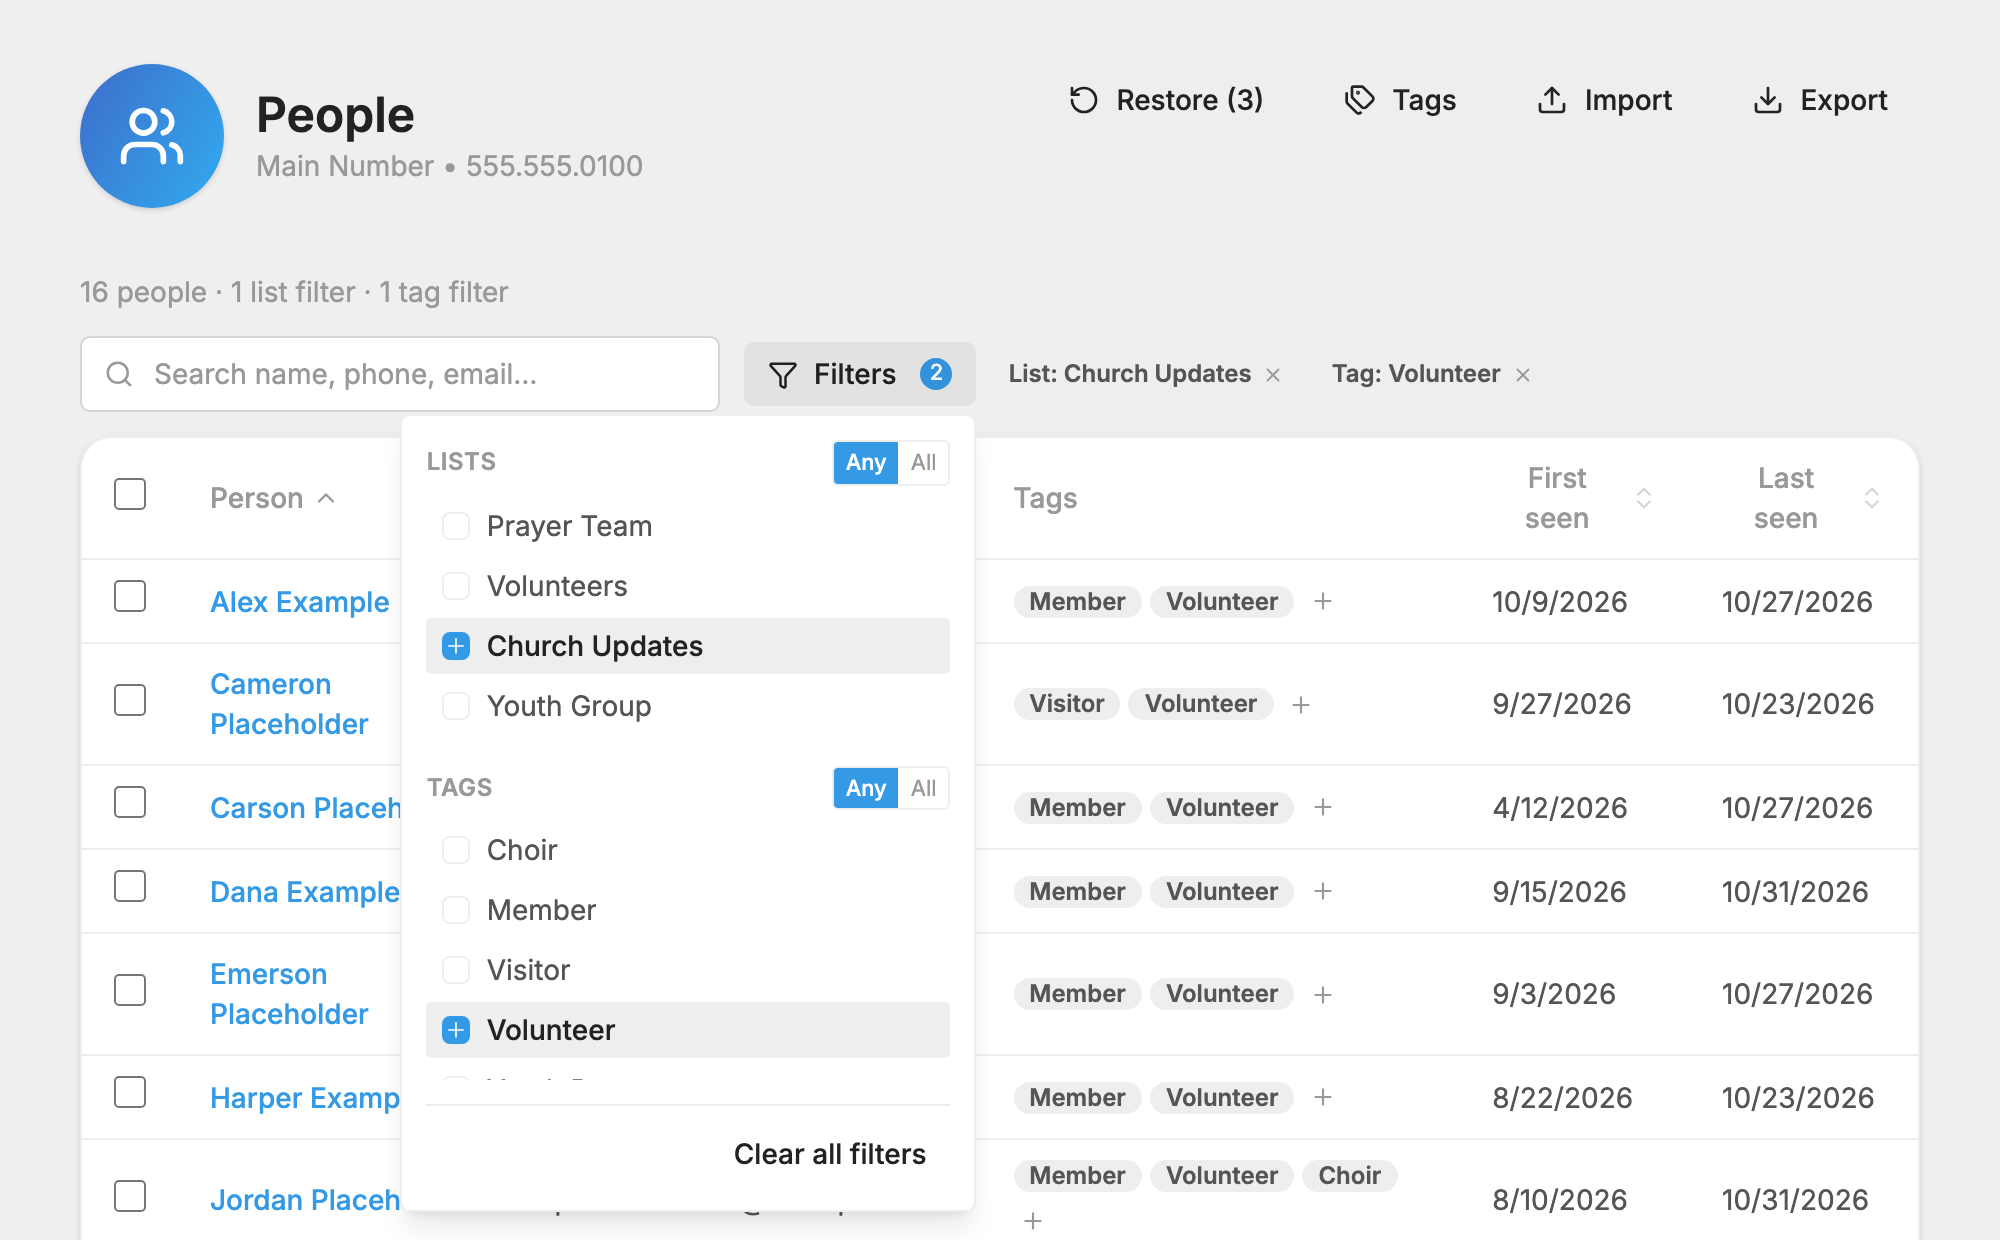
The line above the table counts the people showing.
Add a person
Only add someone who has agreed to get texts from you.
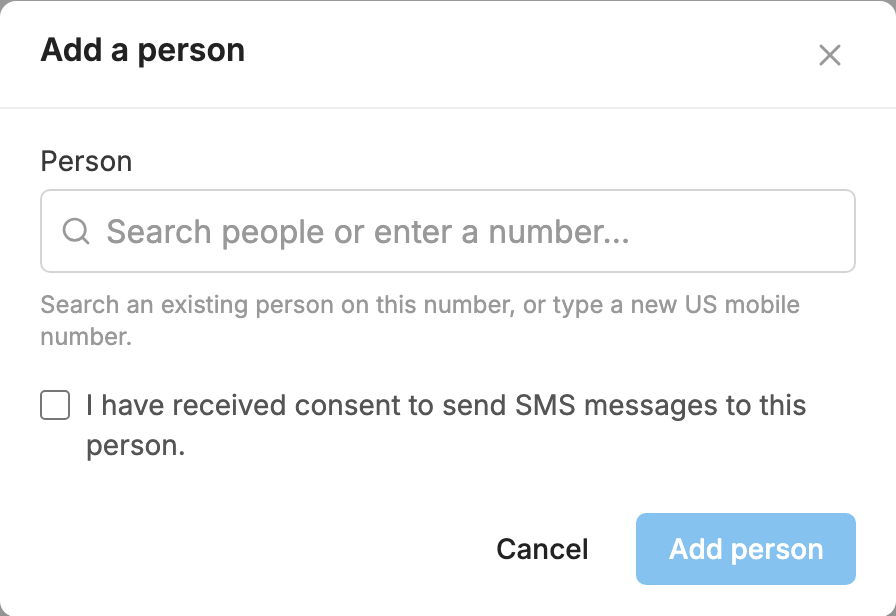
- Click Add Person.
- Type their US mobile number, or search for someone already on your number.
- Tick I have received consent to send SMS messages to this person.
- Click Add person. Their profile opens.
Import people from a spreadsheet
Use this for people who have already given you permission to text them.
- Click Import.
- Choose a .csv, .tsv or .txt file. In Excel or Numbers, save or export your spreadsheet as a CSV first. You can import up to 5,000 rows at a time, in a file up to 8 MB.
- Tick both statements about permission, and click Next.
- Say whether the first row holds Column names or Subscriber data, and click Next.
- Match each column to a field, such as Mobile Number or Name (First). One column must be the mobile number. Columns left as (Ignore) are not imported.
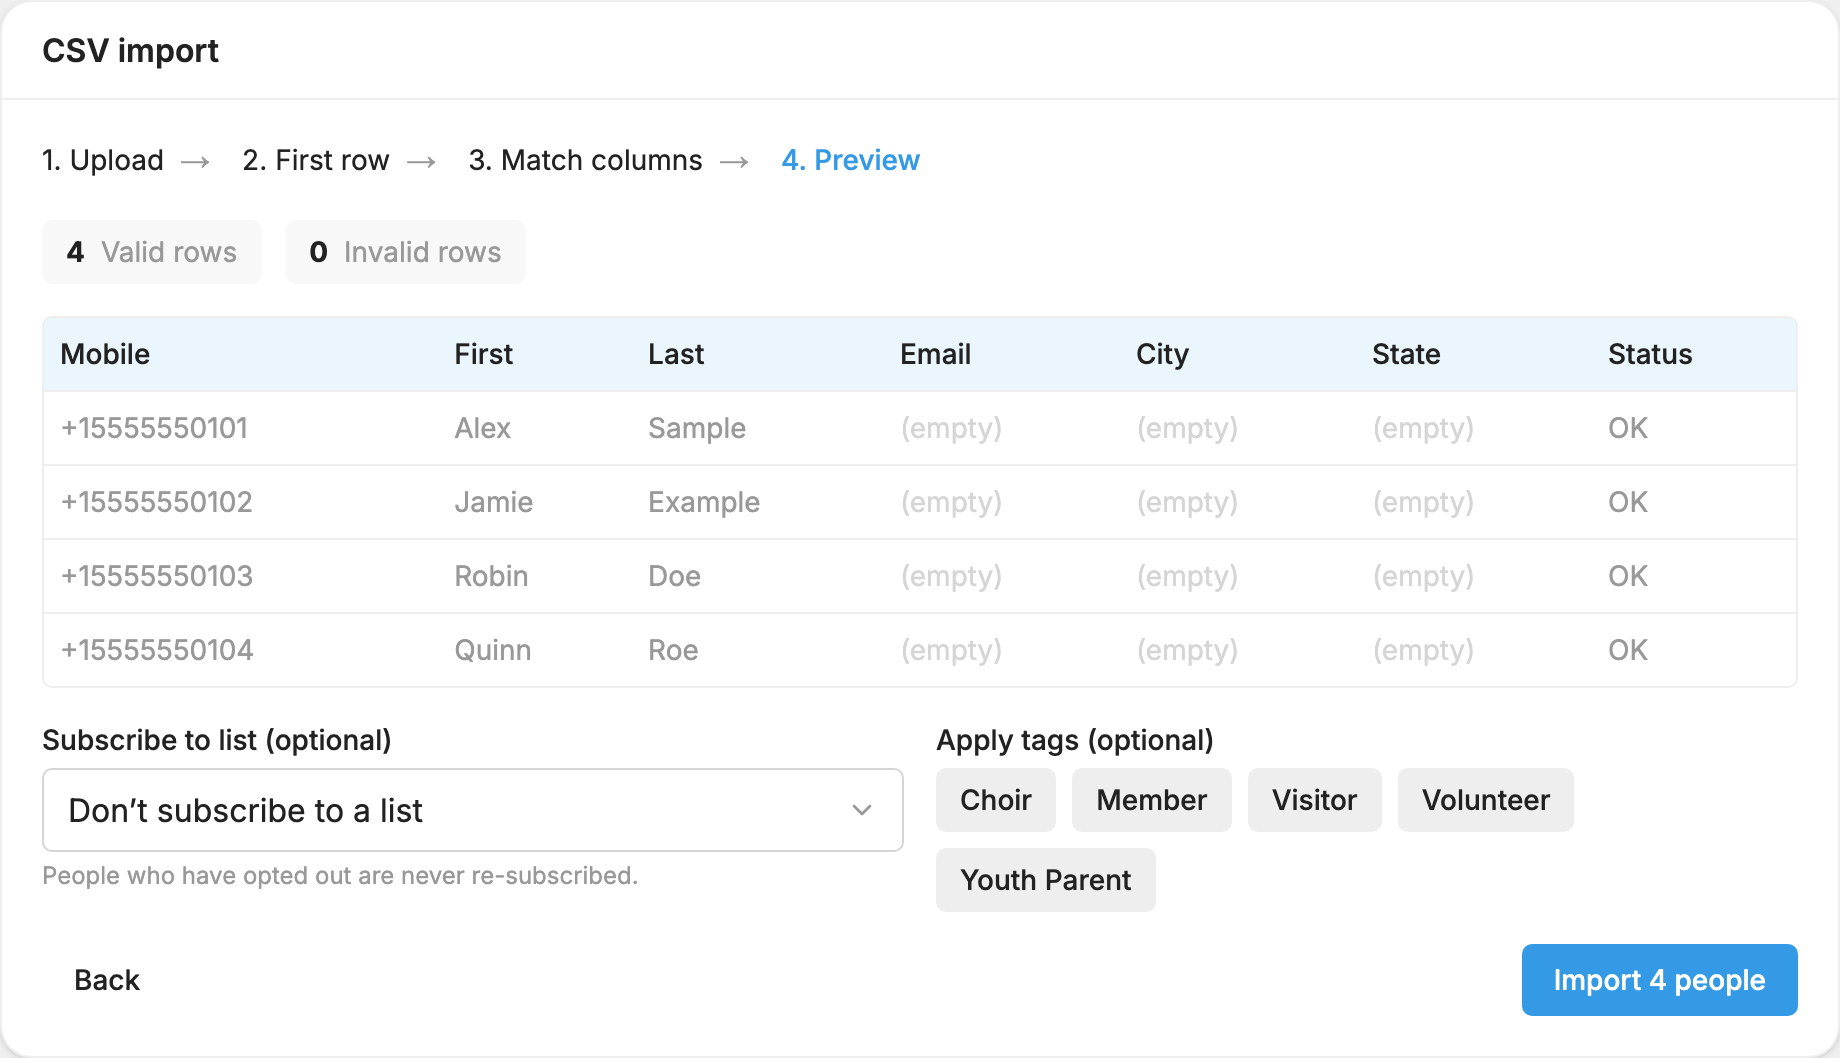
- Check the Preview. You can pick Subscribe to list (optional) and Apply tags (optional).
- Click the Import button, which shows the number of people.
When it finishes you see how many people were added, matched or skipped. An import fills in missing details but doesn't change details you already have. Rows with an invalid mobile number are skipped, and people who have opted out are never subscribed to a list. For more, see Import a Spreadsheet of People.
Tags
A tag is a label you put on people, such as Volunteers or Small Group. Use tags to filter this page and to narrow who gets a message.
- Add or remove a tag on one person: click the small plus in their Tags column, or use the Tags box on their profile.
- Tag many people: tick them and choose Apply tag.
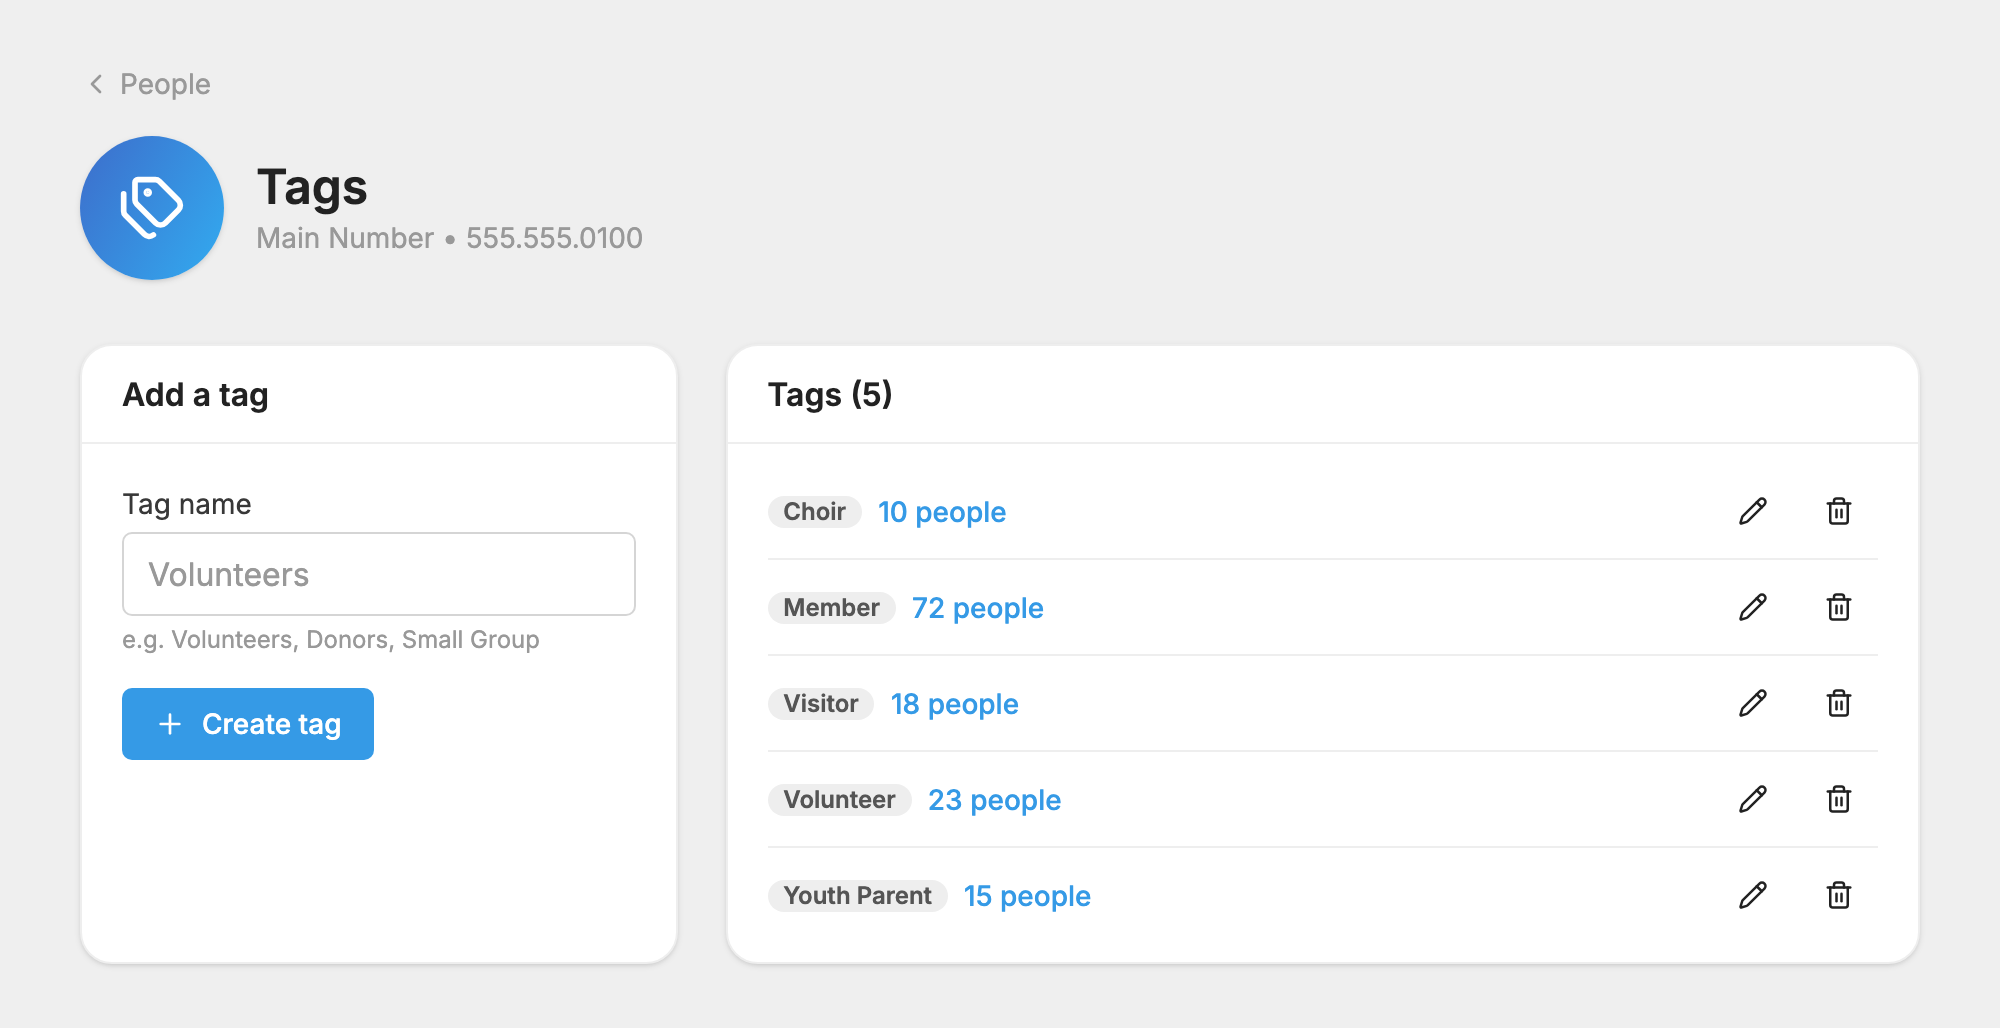
- Manage your tags: click Tags at the top of the page. Create tag adds one. The count next to each tag opens the people who have it. The pencil renames a tag and the trash can deletes it.
Deleting a tag removes it from everyone. The delete box warns you if a scheduled message depends on that tag, because some of those messages may not send once it is gone.
Act on several people
Tick the boxes next to people. The box at the top of the table selects everyone on the page. A Select all link then appears, with a count, to include everyone who matches your search and filters.
A bar appears at the bottom of the page:
- Send message: see Send to the people you chose.
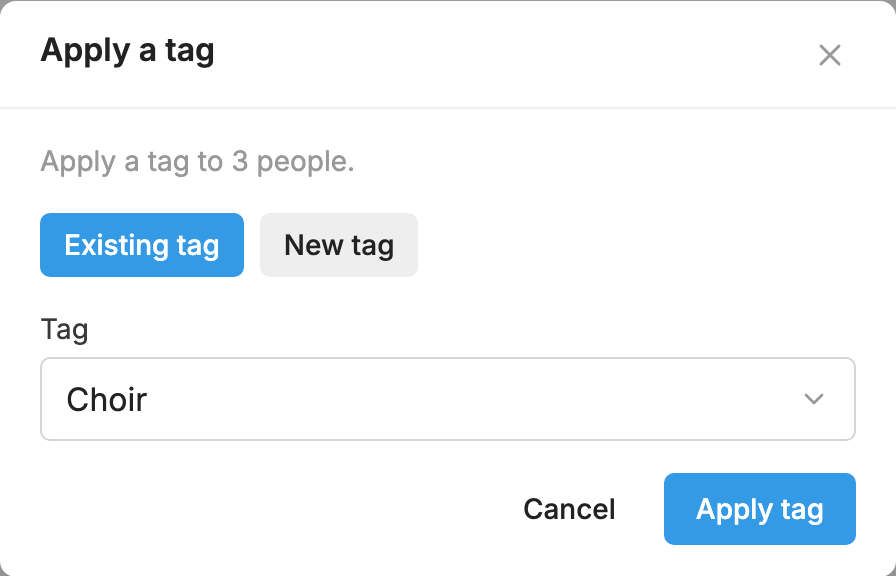
- Apply tag: choose Existing tag or New tag, then click Apply tag.
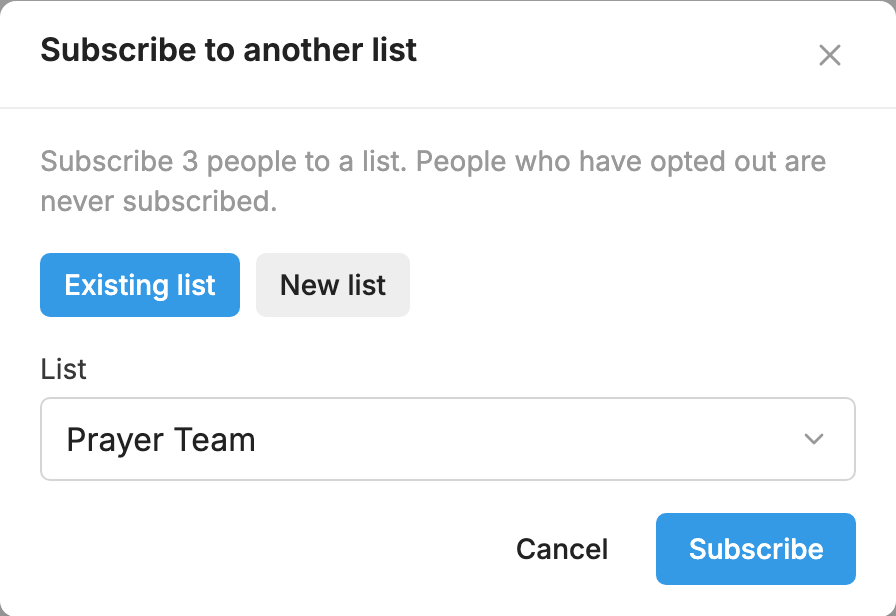
- Subscribe to list: choose Existing list or New list, then click Subscribe. People who have opted out are skipped.
- Export: downloads only the people you selected.
- Remove: asks you to confirm, then removes them from this number. This unsubscribes them from all lists and cancels any recurring donations.

Send to the people you chose
- Tick the people, or use your filters and select all of them.
- Click Send message.
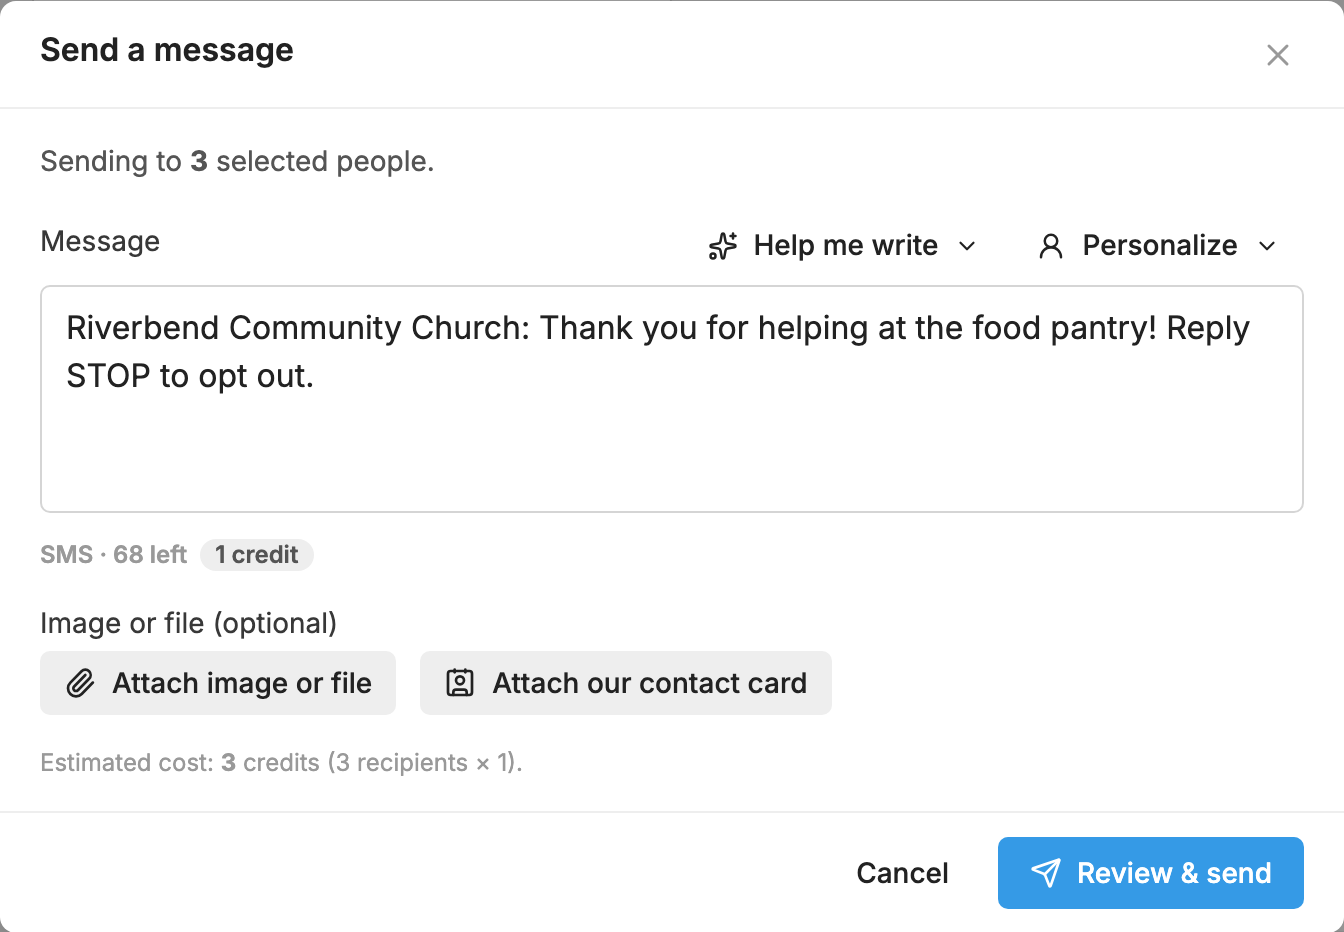
- Write the message. Help me write, Personalize and attachments work as they do on the
 Messages page.
- Check the estimated cost, and click Review & send.
- Read the summary and click Send to, which shows the number of people.
The message goes out right away, and you can send to up to 10,000 people at once. People who have texted STOP, and blocked numbers, are left out of the count. It then appears on the Messages page as sent to that number of hand-picked people.
If you select one person, Send message opens your conversation with them instead.
Export
Click Export at the top of the page to download people.csv. It holds everyone matching your current search and filters, with their ID, first name, last name, phone number, address, city, state, ZIP and email.
To export only certain people, tick them and use Export in the bar at the bottom.
A person's profile
Click a name to open their profile. What you see depends on your login's access.
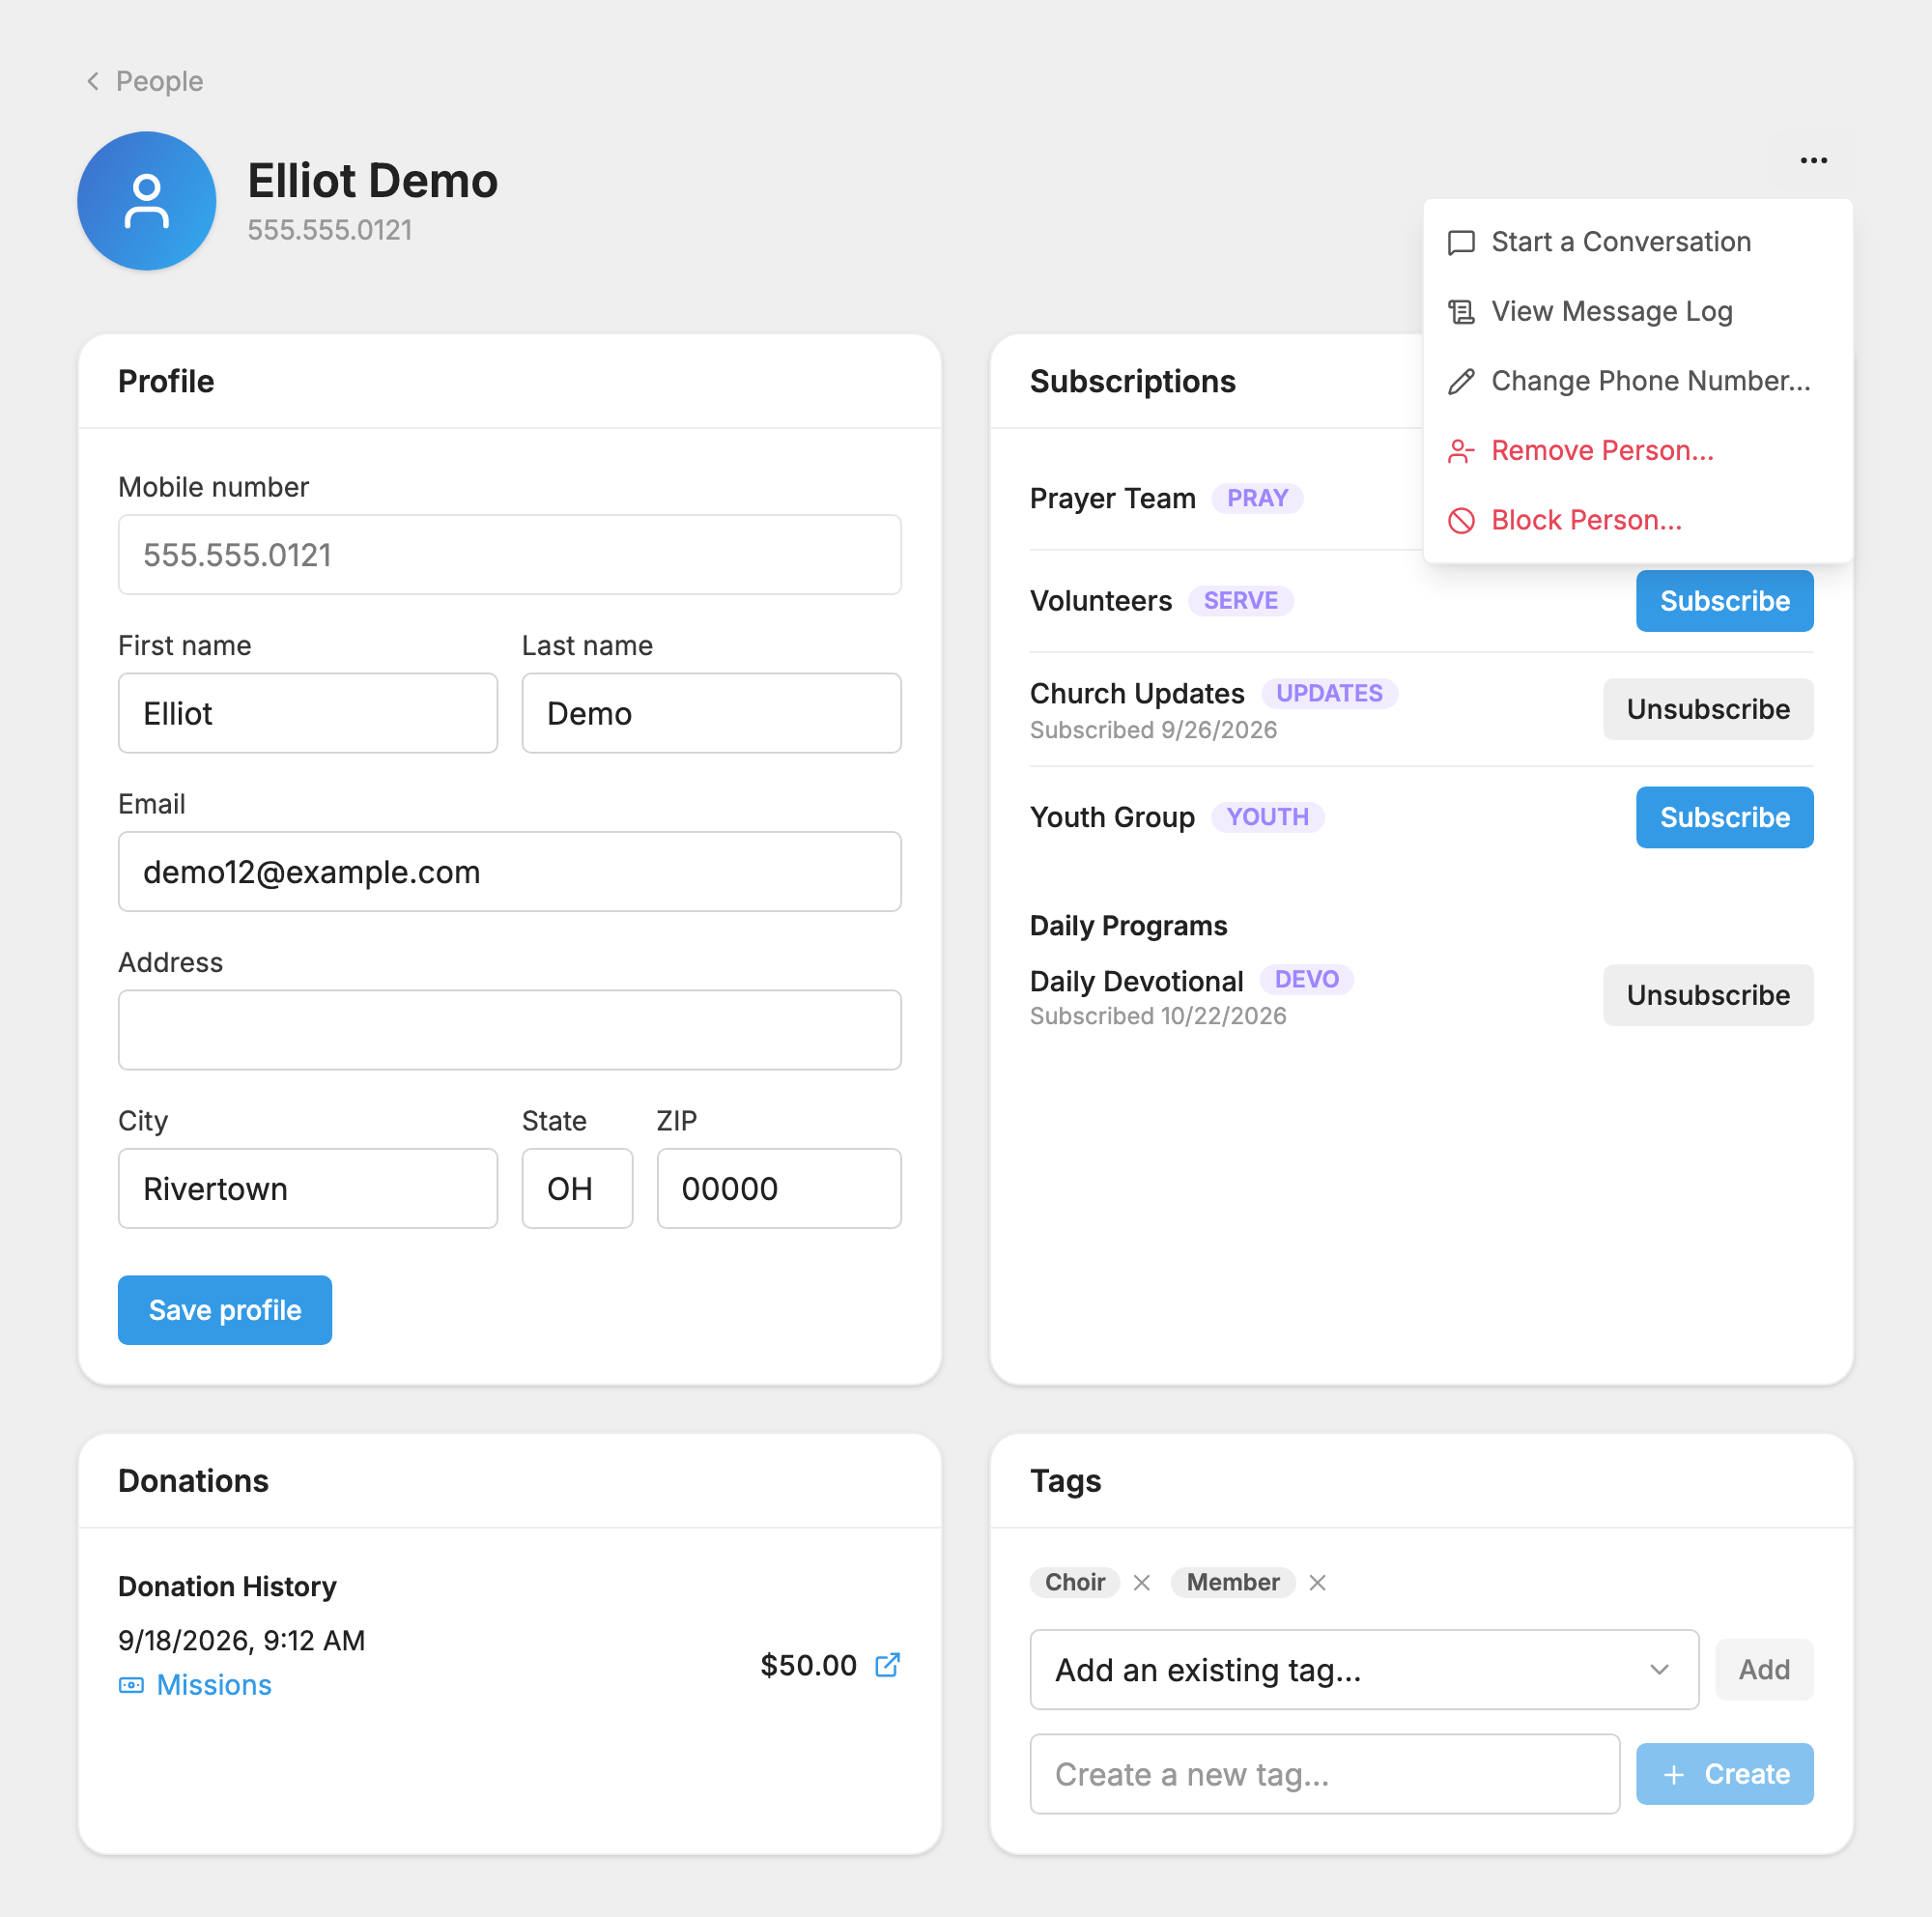
Badges next to the number show if they are Opted out, Blocked, or Deleted (hidden).
- Profile: change their name, email and address, then click Save profile. If they saved a card for giving, Payment Info shows it, and Clear removes it. If your account is connected to CCB (Church Community Builder), you can also link or unlink their CCB profile here.
- Subscriptions: every list and daily program on your number, with Subscribe or Unsubscribe next to each.
- Donations: their Scheduled Donations and Donation History. Cancel stops a scheduled donation right away.
- Tags: add, create or remove tags.
The three-dot menu at the top right has more:
- Start a Conversation
- View Message Log: the
 Message Log, showing only this person.
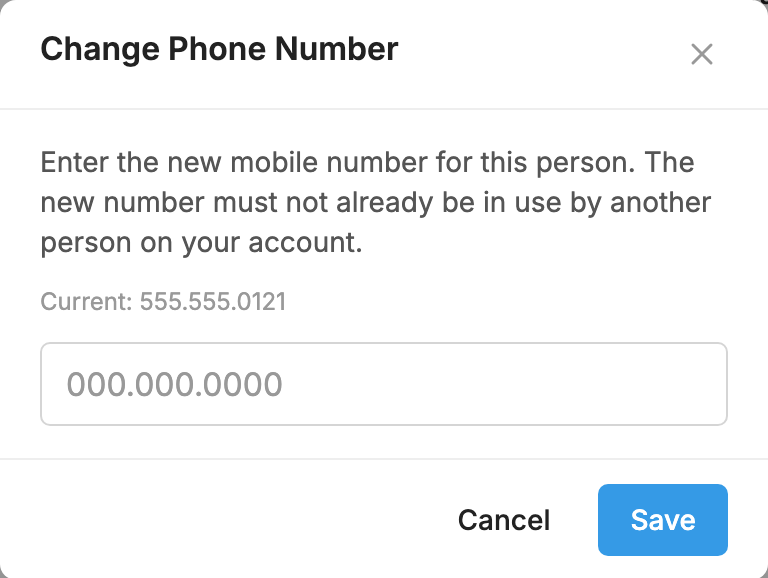
- Change Phone Number…: for when someone gets a new number. The new number can't already belong to another person on your account.
- Remove Person…
- Block Person…
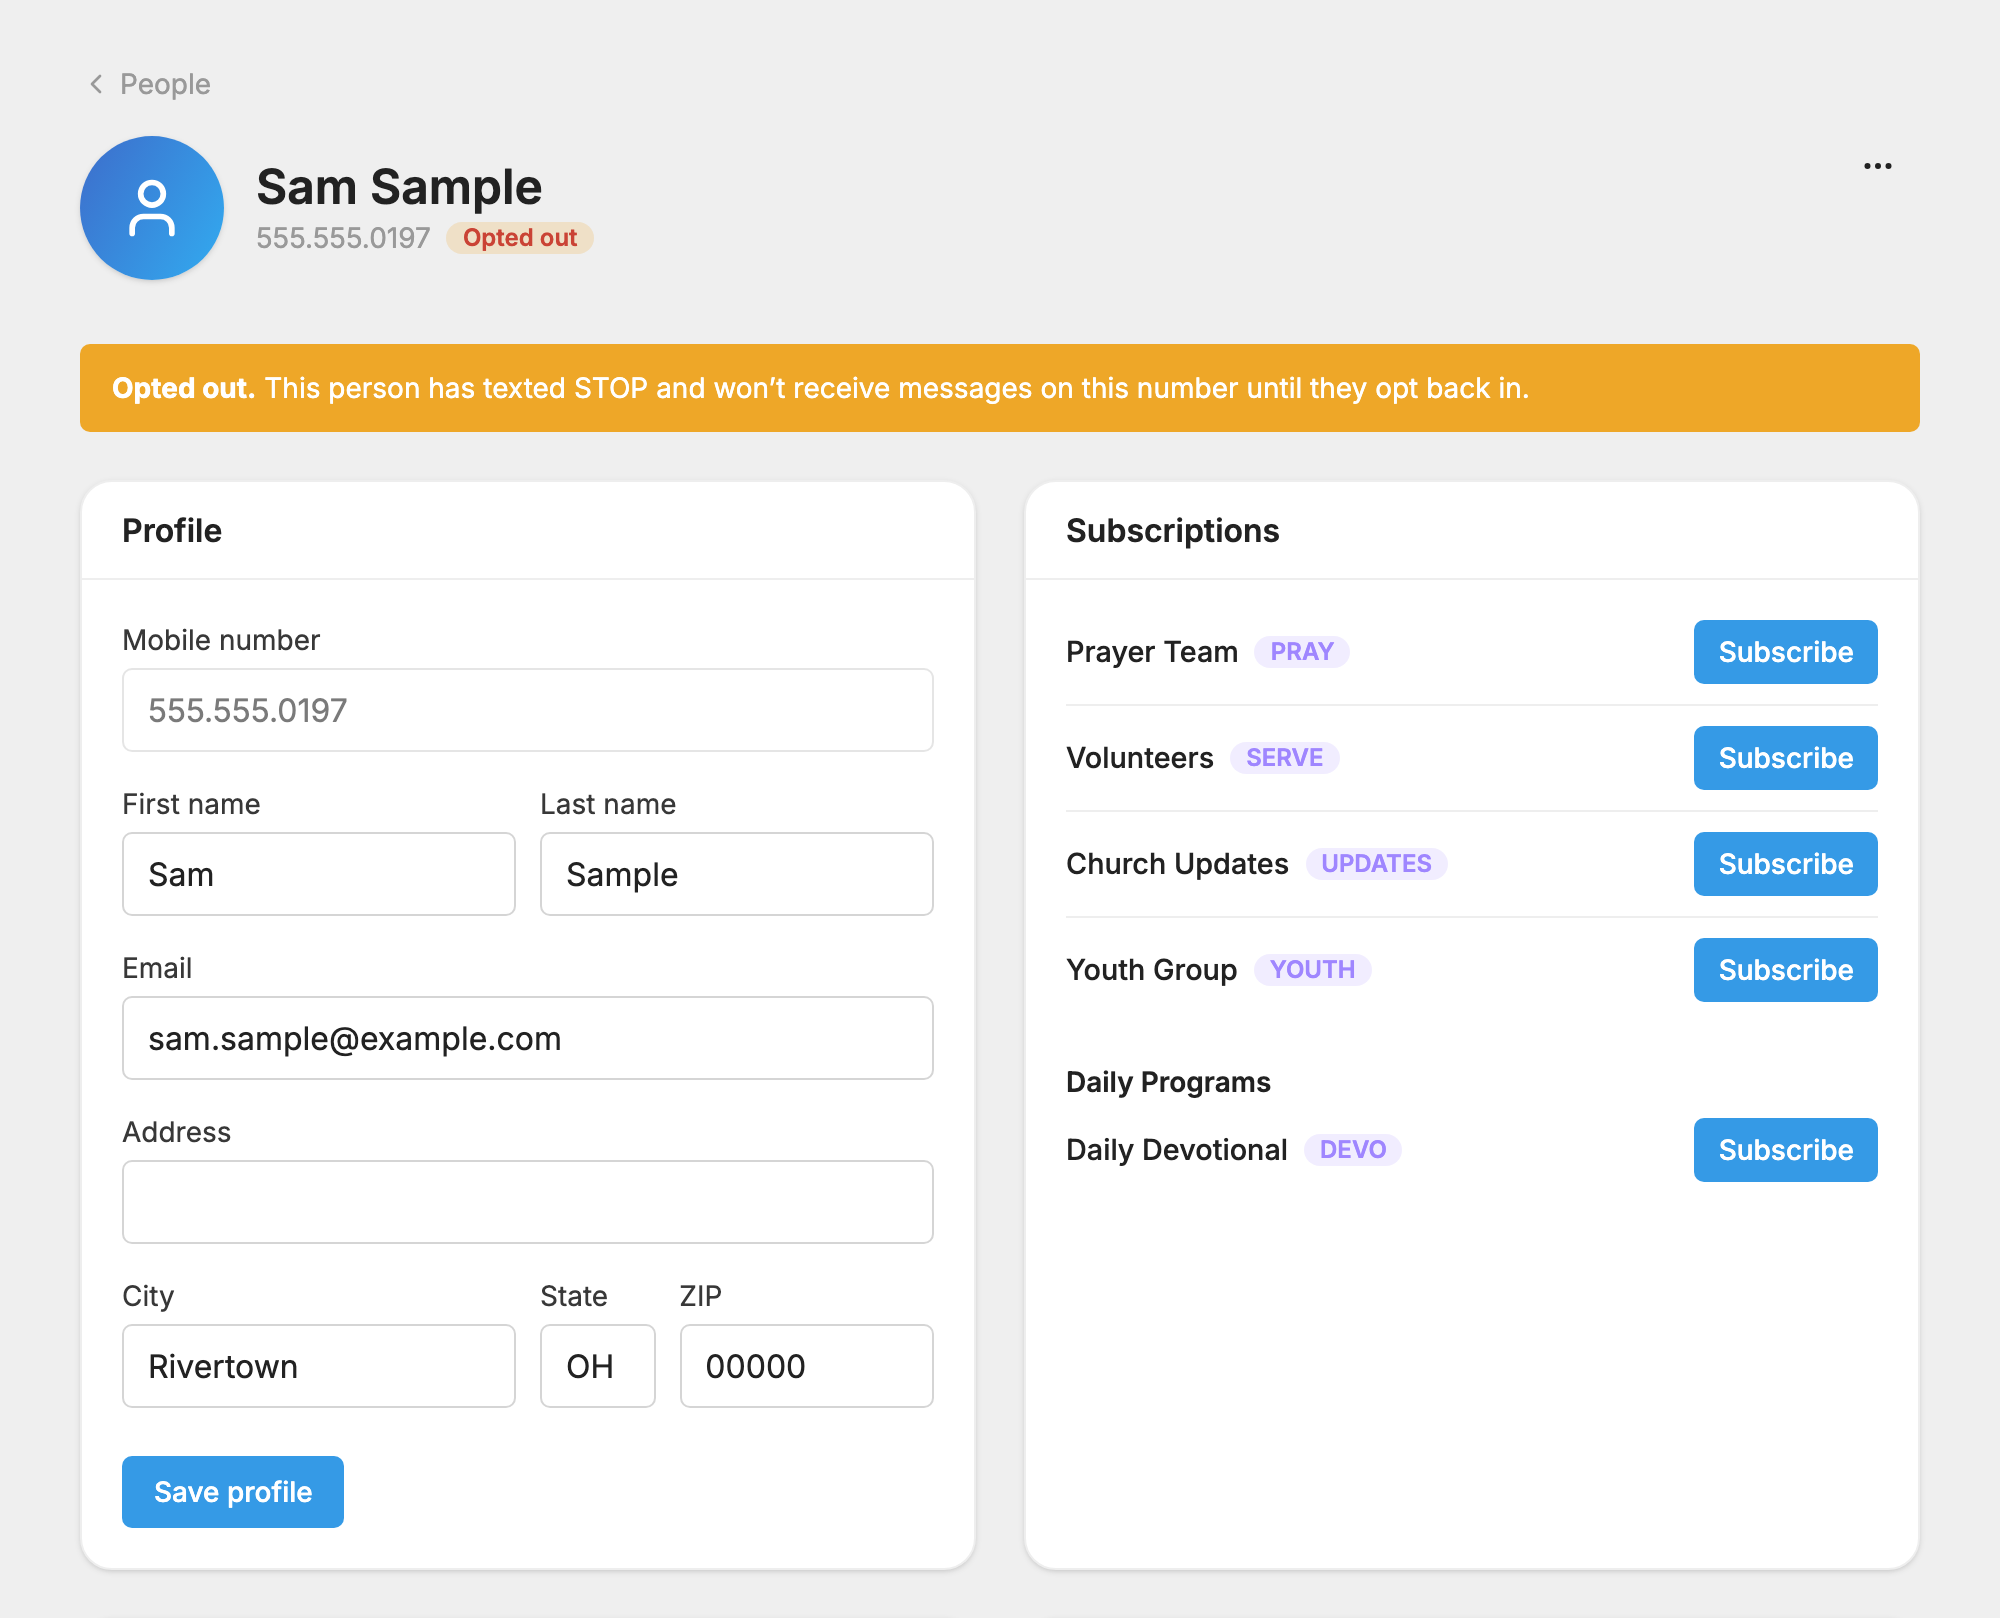
People who texted STOP
Their profile shows Opted out, and they won't receive messages on this number until they opt back in. You can't subscribe them yourself, by hand or by import. They have to text in again. See opting back in after STOP.
Remove or block someone
Remove Person… takes them off this number. They are unsubscribed from all of its lists, and any recurring donations and saved payment info are cancelled. They can text in again to rejoin.
Block Person… is for spammers. Their texts are dropped before they reach any number on your account, and they are also removed from this number and unsubscribed.
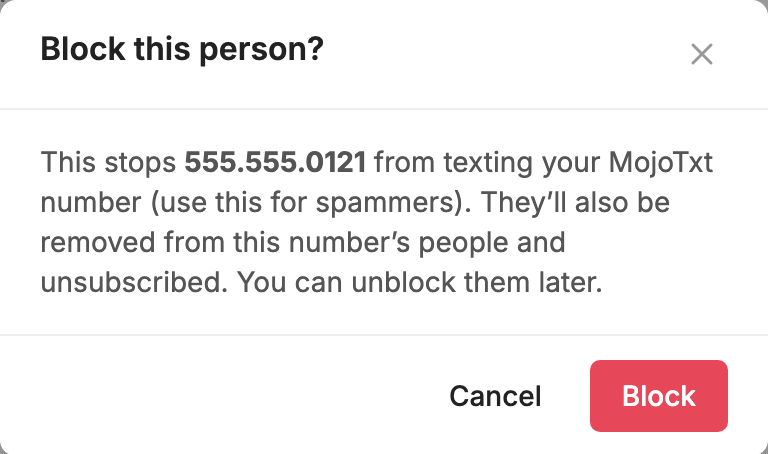
A removed or blocked person no longer shows in the table, but you can still reach their profile. Find a message from them in the Message Log and click their name. Then use the three-dot menu:
- Unblock Person lets their texts through again. They stay removed.
- Undelete (restore) puts them back on your People page. It doesn't put them back on their lists.
Resubscribe people who were dropped automatically
When Auto-unsubscribe is on in Phone Number Settings, someone is taken off your lists and daily programs if their last 5 messages came back undeliverable. A problem at a phone company can drop many people at once, and you can put them back.
If anyone has been dropped this way, a Restore button with a count appears at the top of the People page.
- Click Restore.
- Choose a List, or leave it on All lists & programs.
- To restore one problem period, set From (outage start) and To (outage end), or click a date under Recent auto-unsubscribe spikes.
- Click Preview to see how many subscribers will be restored.
- Click the Restore button, and confirm with Restore.
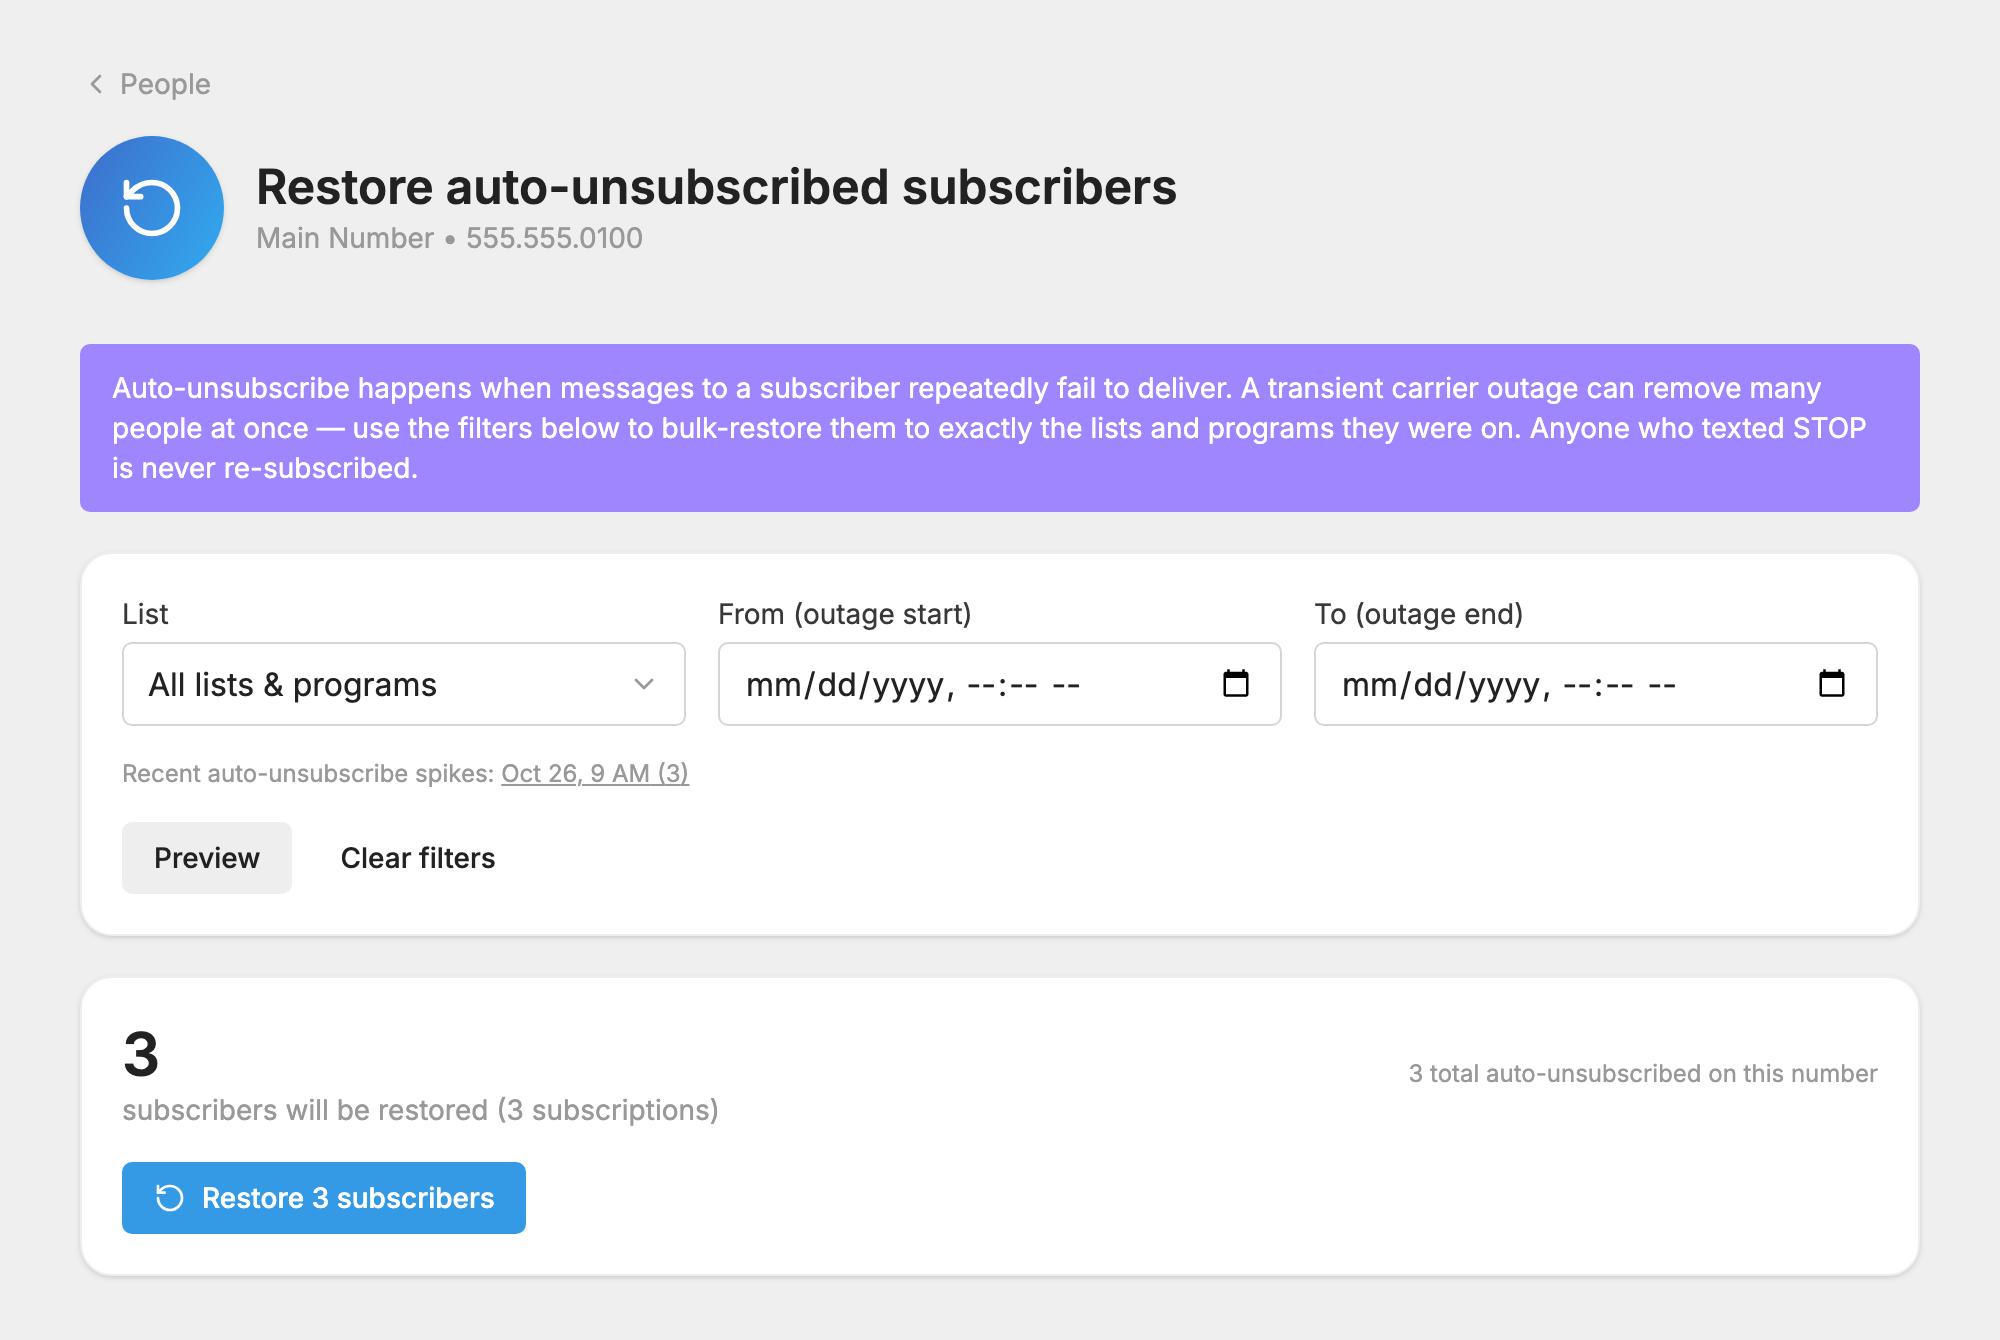
They go back to exactly the lists and programs they were on. Anyone who texted STOP is never resubscribed. They are skipped and left as they are.
